Replio Documentation
Comprehensive guide to all Replio features - from basics to advanced functionality
The dashboard is the command center of Replio. Here you'll see all the most important statistics and metrics about your Allegro business.
Ładowanie...
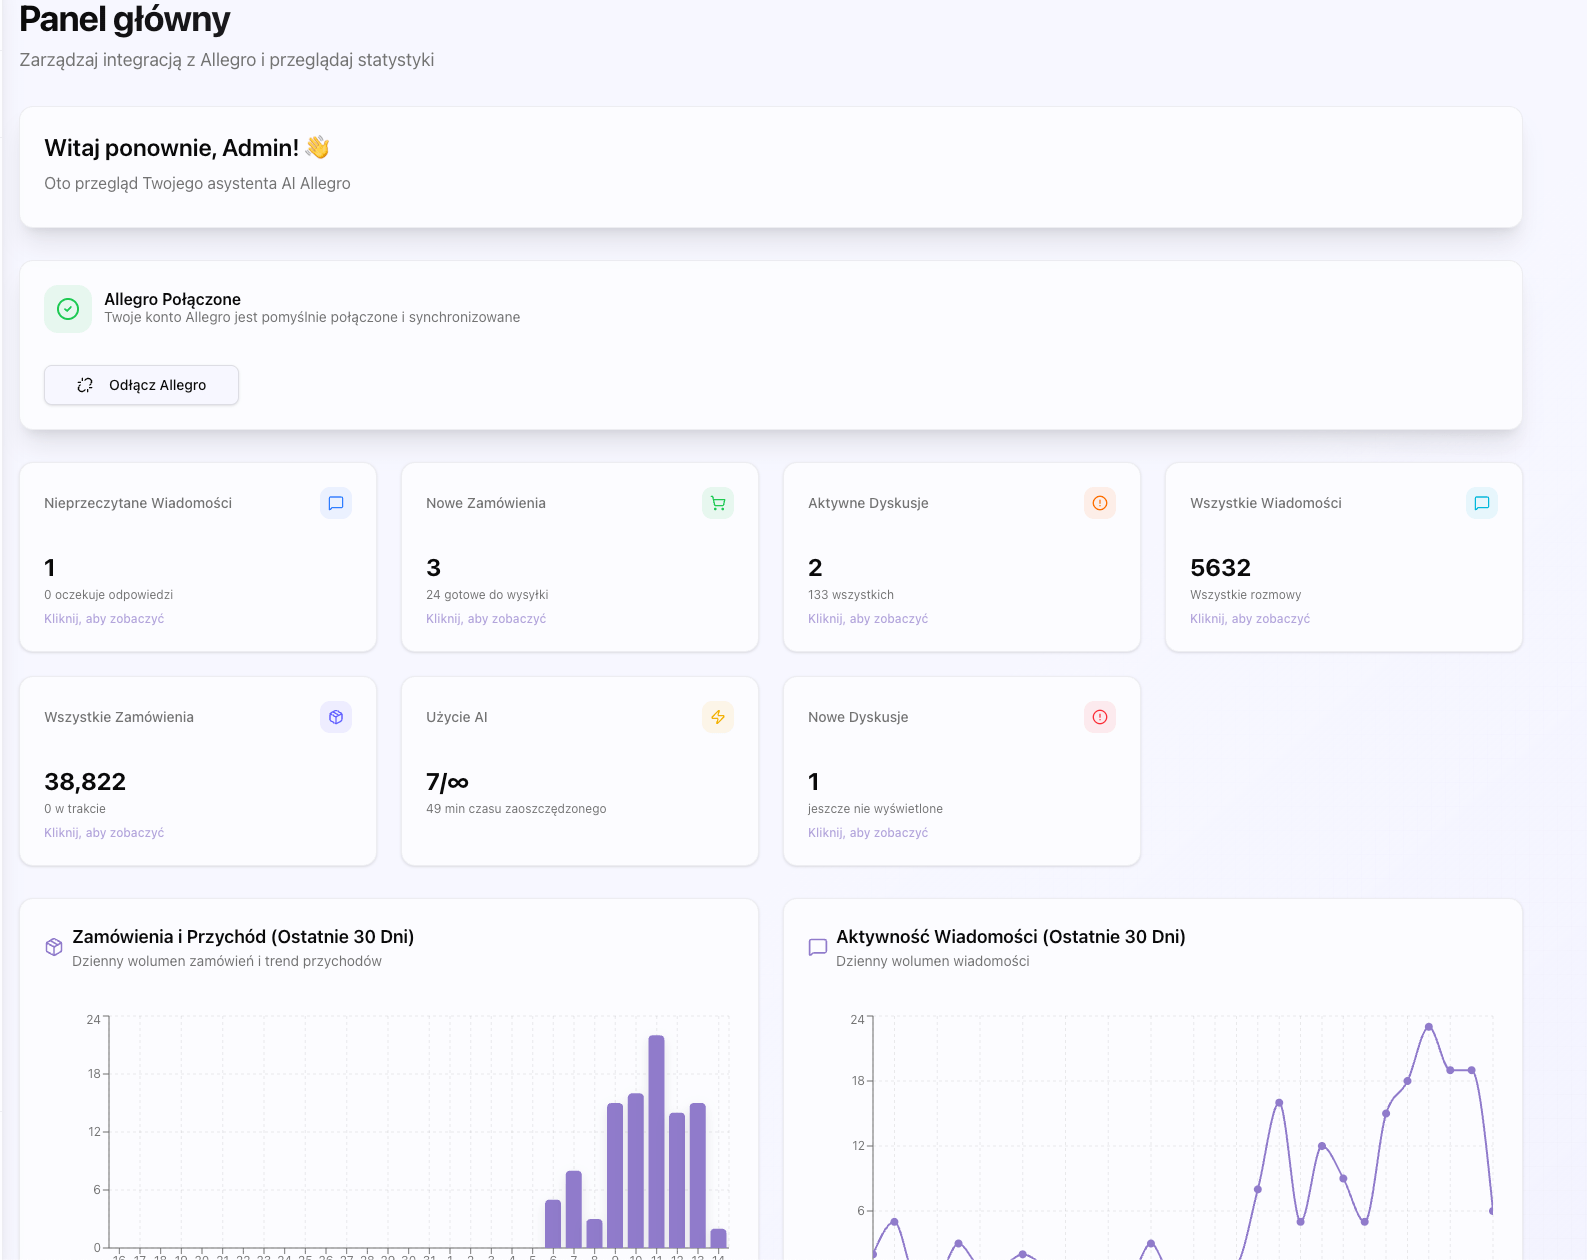
Allegro Connection
To start using Replio, you must first connect your Allegro account:
Ładowanie...

Ładowanie...

documentation.sections.dashboard.connection.connected.title
documentation.sections.dashboard.connection.connected.description
- documentation.sections.dashboard.connection.connected.detail1
- documentation.sections.dashboard.connection.connected.detail2
- documentation.sections.dashboard.connection.connected.detail3
- documentation.sections.dashboard.connection.connected.detail4
documentation.sections.dashboard.connection.notConnected.title
documentation.sections.dashboard.connection.notConnected.description
- documentation.sections.dashboard.connection.notConnected.detail1
- documentation.sections.dashboard.connection.notConnected.detail2
- documentation.sections.dashboard.connection.notConnected.detail3
- documentation.sections.dashboard.connection.notConnected.detail4
documentation.sections.dashboard.connection.process.title
documentation.sections.dashboard.connection.process.description
- documentation.sections.dashboard.connection.process.step1
- documentation.sections.dashboard.connection.process.step2
- documentation.sections.dashboard.connection.process.step3
- documentation.sections.dashboard.connection.process.step4
- documentation.sections.dashboard.connection.process.step5
- documentation.sections.dashboard.connection.process.step6
- documentation.sections.dashboard.connection.process.step7
documentation.sections.dashboard.connection.process.security
documentation.sections.dashboard.connection.disconnect.title
documentation.sections.dashboard.connection.disconnect.description
documentation.sections.dashboard.connection.disconnect.warning
Statistics Tiles
The dashboard displays seven main statistics tiles that you can click to navigate to relevant sections:
Ładowanie...
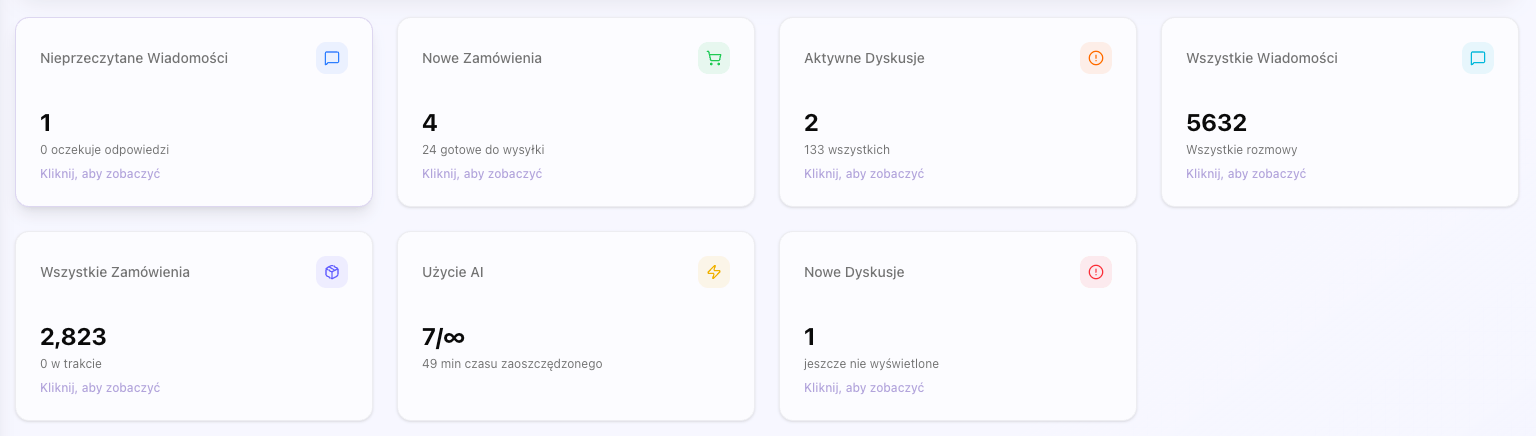
documentation.sections.dashboard.stats.layout.title
documentation.sections.dashboard.stats.layout.description
documentation.sections.dashboard.stats.unreadMessages.description
- documentation.sections.dashboard.stats.unreadMessages.detail1
- documentation.sections.dashboard.stats.unreadMessages.detail2
- documentation.sections.dashboard.stats.unreadMessages.detail3
- documentation.sections.dashboard.stats.unreadMessages.detail4
documentation.sections.dashboard.stats.unreadMessages.clickAction
documentation.sections.dashboard.stats.newOrders.description
- documentation.sections.dashboard.stats.newOrders.detail1
- documentation.sections.dashboard.stats.newOrders.detail2
- documentation.sections.dashboard.stats.newOrders.detail3
- documentation.sections.dashboard.stats.newOrders.detail4
documentation.sections.dashboard.stats.newOrders.clickAction
documentation.sections.dashboard.stats.activeDisputes.description
- documentation.sections.dashboard.stats.activeDisputes.detail1
- documentation.sections.dashboard.stats.activeDisputes.detail2
- documentation.sections.dashboard.stats.activeDisputes.detail3
- documentation.sections.dashboard.stats.activeDisputes.detail4
documentation.sections.dashboard.stats.activeDisputes.clickAction
documentation.sections.dashboard.stats.totalMessages.description
- documentation.sections.dashboard.stats.totalMessages.detail1
- documentation.sections.dashboard.stats.totalMessages.detail2
- documentation.sections.dashboard.stats.totalMessages.detail3
- documentation.sections.dashboard.stats.totalMessages.detail4
documentation.sections.dashboard.stats.totalMessages.clickAction
documentation.sections.dashboard.stats.totalOrders.description
- documentation.sections.dashboard.stats.totalOrders.detail1
- documentation.sections.dashboard.stats.totalOrders.detail2
- documentation.sections.dashboard.stats.totalOrders.detail3
- documentation.sections.dashboard.stats.totalOrders.detail4
documentation.sections.dashboard.stats.totalOrders.clickAction
documentation.sections.dashboard.stats.aiUsage.description
- documentation.sections.dashboard.stats.aiUsage.detail1
- documentation.sections.dashboard.stats.aiUsage.detail2
- documentation.sections.dashboard.stats.aiUsage.detail3
- documentation.sections.dashboard.stats.aiUsage.detail4
documentation.sections.dashboard.stats.aiUsage.timeSaved
documentation.sections.dashboard.stats.newDisputes.description
- documentation.sections.dashboard.stats.newDisputes.detail1
- documentation.sections.dashboard.stats.newDisputes.detail2
- documentation.sections.dashboard.stats.newDisputes.detail3
- documentation.sections.dashboard.stats.newDisputes.detail4
documentation.sections.dashboard.stats.newDisputes.clickAction
documentation.sections.dashboard.stats.interactivity.title
documentation.sections.dashboard.stats.interactivity.description
documentation.sections.dashboard.charts.title
documentation.sections.dashboard.charts.description
Ładowanie...
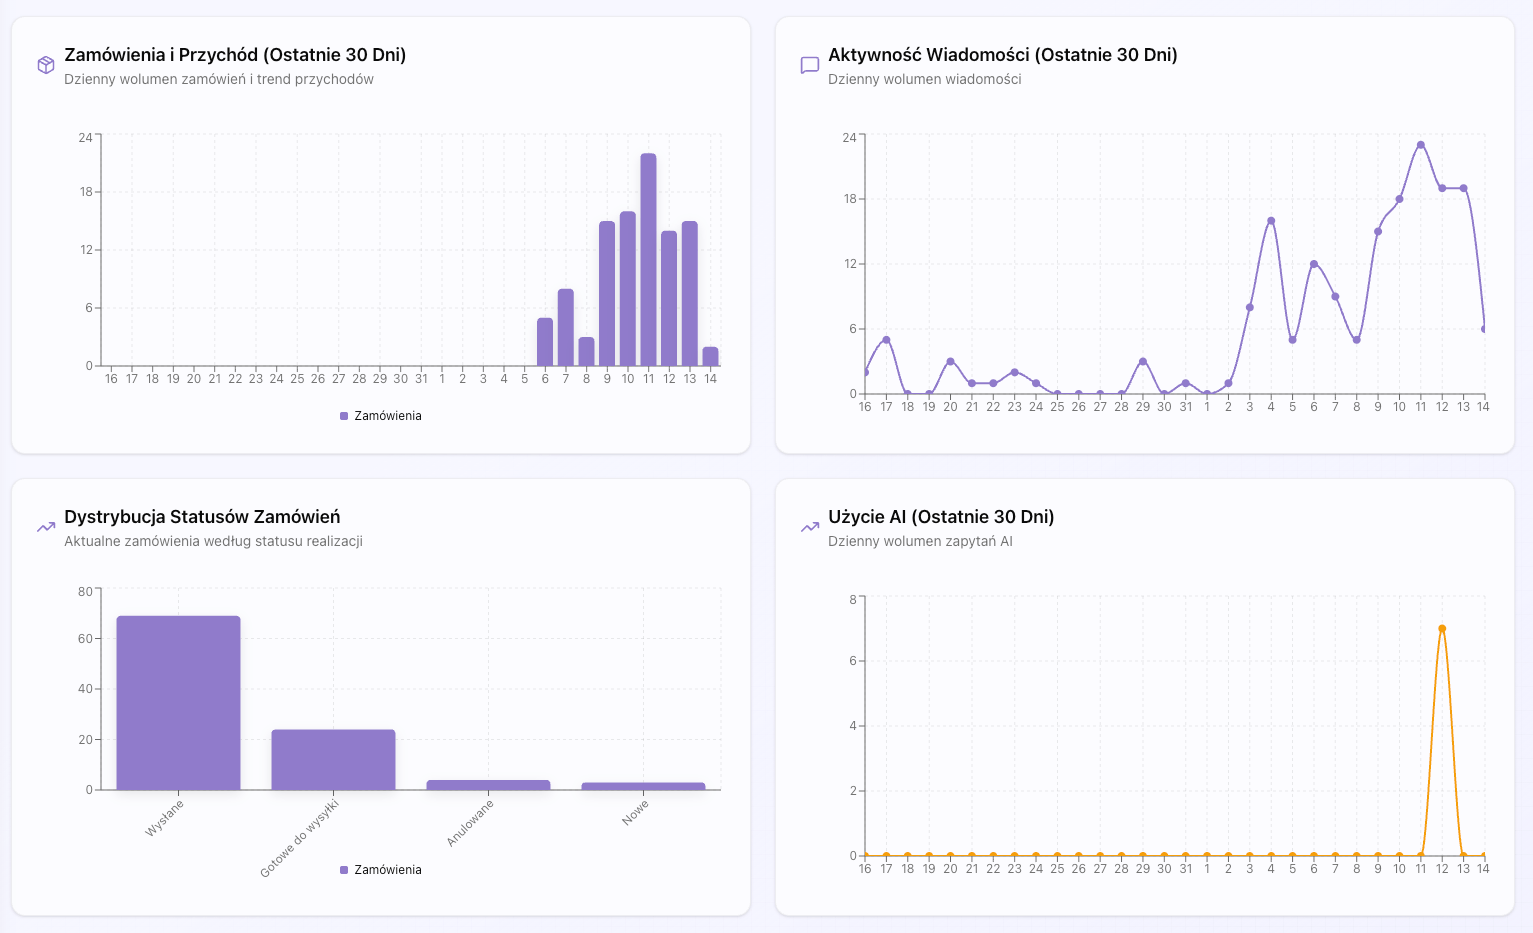
documentation.sections.dashboard.charts.messagesChart.title
documentation.sections.dashboard.charts.messagesChart.description
documentation.sections.dashboard.charts.ordersChart.title
documentation.sections.dashboard.charts.ordersChart.description
documentation.sections.dashboard.charts.interactivity.title
documentation.sections.dashboard.charts.interactivity.description
Data Synchronization
Replio automatically synchronizes data with Allegro every 5 minutes for messages and every 30 minutes for disputes. You can also manually synchronize data by clicking the 'Sync' button.
documentation.sections.dashboard.sync.automatic.title
documentation.sections.dashboard.sync.automatic.description
- Wiadomości: documentation.sections.dashboard.sync.automatic.messages
- Dyskusje: documentation.sections.dashboard.sync.automatic.disputes
- Zamówienia: documentation.sections.dashboard.sync.automatic.orders
documentation.sections.dashboard.sync.manual.title
documentation.sections.dashboard.sync.manual.description
documentation.sections.dashboard.sync.manual.whenToUse
- documentation.sections.dashboard.sync.manual.when1
- documentation.sections.dashboard.sync.manual.when2
- documentation.sections.dashboard.sync.manual.when3
documentation.sections.dashboard.sync.lastSync.title
documentation.sections.dashboard.sync.lastSync.description
The messages list page allows you to browse all conversations with customers. You can filter, search, and manage messages in one place.
Ładowanie...
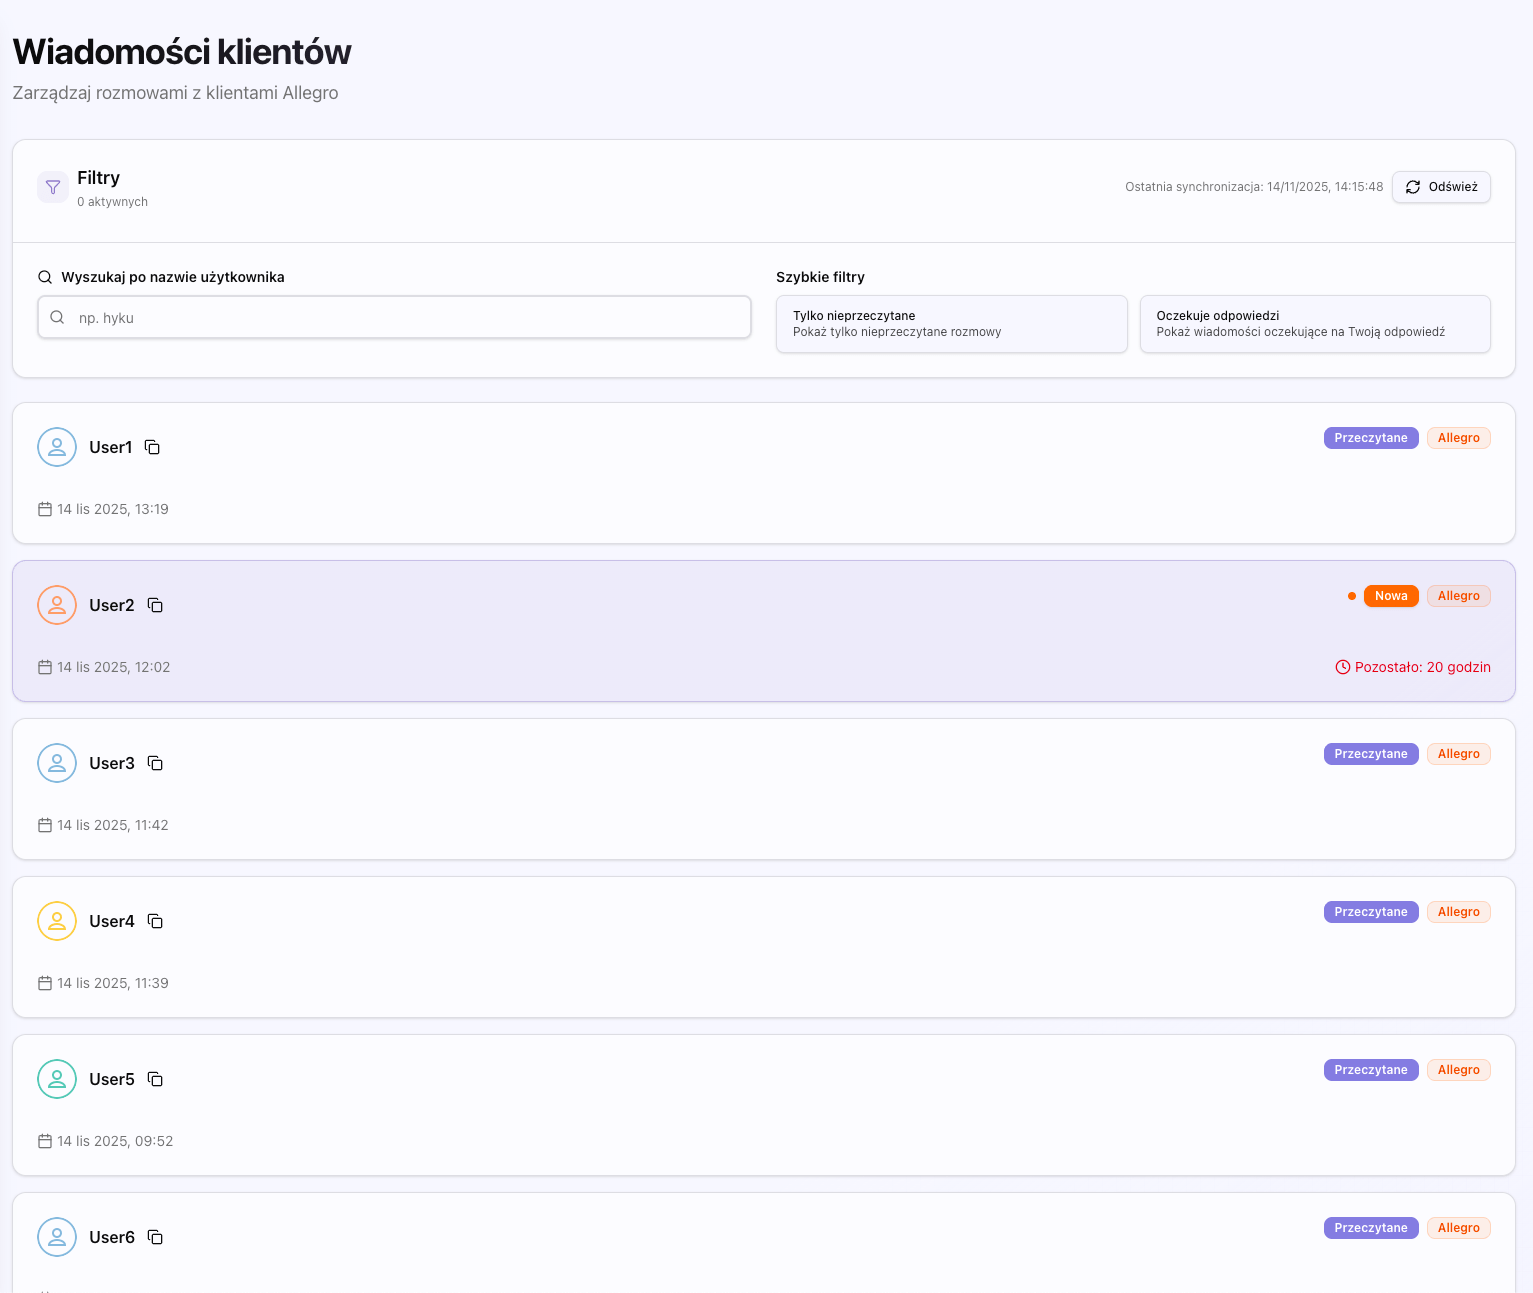
Message Filters
documentation.sections.messagesList.filters.description
Ładowanie...

documentation.sections.messagesList.filters.card.title
documentation.sections.messagesList.filters.card.description
- documentation.sections.messagesList.filters.card.detail1
- documentation.sections.messagesList.filters.card.detail2
- documentation.sections.messagesList.filters.card.detail3
- documentation.sections.messagesList.filters.card.detail4
documentation.sections.messagesList.filters.unread.title
documentation.sections.messagesList.filters.unread.description
documentation.sections.messagesList.filters.unread.howItWorks
documentation.sections.messagesList.filters.unread.useCase
- documentation.sections.messagesList.filters.unread.useCase1
- documentation.sections.messagesList.filters.unread.useCase2
- documentation.sections.messagesList.filters.unread.useCase3
documentation.sections.messagesList.filters.awaiting.title
documentation.sections.messagesList.filters.awaiting.description
documentation.sections.messagesList.filters.awaiting.howItWorks
documentation.sections.messagesList.filters.awaiting.useCase
- documentation.sections.messagesList.filters.awaiting.useCase1
- documentation.sections.messagesList.filters.awaiting.useCase2
- documentation.sections.messagesList.filters.awaiting.useCase3
documentation.sections.messagesList.filters.awaiting.importance
documentation.sections.messagesList.filters.search.title
documentation.sections.messagesList.filters.search.description
documentation.sections.messagesList.filters.search.howItWorks
documentation.sections.messagesList.filters.search.features
- documentation.sections.messagesList.filters.search.feature1
- documentation.sections.messagesList.filters.search.feature2
- documentation.sections.messagesList.filters.search.feature3
- documentation.sections.messagesList.filters.search.feature4
documentation.sections.messagesList.filters.search.useCase
- documentation.sections.messagesList.filters.search.useCase1
- documentation.sections.messagesList.filters.search.useCase2
- documentation.sections.messagesList.filters.search.useCase3
documentation.sections.messagesList.filters.clearAll.title
documentation.sections.messagesList.filters.clearAll.description
documentation.sections.messagesList.filters.clearAll.behavior
- documentation.sections.messagesList.filters.clearAll.behavior1
- documentation.sections.messagesList.filters.clearAll.behavior2
- documentation.sections.messagesList.filters.clearAll.behavior3
- documentation.sections.messagesList.filters.clearAll.behavior4
documentation.sections.messagesList.filters.activeCount.title
documentation.sections.messagesList.filters.activeCount.description
documentation.sections.messagesList.filters.activeCount.purpose
documentation.sections.messagesList.list.title
documentation.sections.messagesList.list.description
Ładowanie...
documentation.sections.messagesList.list.threadCard.title
documentation.sections.messagesList.list.threadCard.description
- documentation.sections.messagesList.list.threadCard.detail1
- documentation.sections.messagesList.list.threadCard.detail2
- documentation.sections.messagesList.list.threadCard.detail3
- documentation.sections.messagesList.list.threadCard.detail4
- documentation.sections.messagesList.list.threadCard.detail5
- documentation.sections.messagesList.list.threadCard.detail6
documentation.sections.messagesList.list.threadCard.clickAction
documentation.sections.messagesList.list.emptyState.title
documentation.sections.messagesList.list.emptyState.description
- documentation.sections.messagesList.list.emptyState.reason1
- documentation.sections.messagesList.list.emptyState.reason2
- documentation.sections.messagesList.list.emptyState.reason3
- documentation.sections.messagesList.list.emptyState.reason4
Infinite Scroll
The messages list automatically loads more results as you scroll down. You don't need to click a 'Next page' button - everything happens automatically.
documentation.sections.messagesList.infiniteScroll.howItWorks
documentation.sections.messagesList.infiniteScroll.benefits
- documentation.sections.messagesList.infiniteScroll.benefit1
- documentation.sections.messagesList.infiniteScroll.benefit2
- documentation.sections.messagesList.infiniteScroll.benefit3
documentation.sections.messagesList.infiniteScroll.loading
Last Synchronization
At the top of the page you'll see information about the last data synchronization. You can also manually synchronize data by clicking the 'Sync' button.
documentation.sections.messagesList.sync.lastSync.title
documentation.sections.messagesList.sync.lastSync.description
- documentation.sections.messagesList.sync.lastSync.format1
- documentation.sections.messagesList.sync.lastSync.format2
- documentation.sections.messagesList.sync.lastSync.format3
documentation.sections.messagesList.sync.lastSync.purpose
documentation.sections.messagesList.sync.syncButton.title
documentation.sections.messagesList.sync.syncButton.description
documentation.sections.messagesList.sync.syncButton.behavior
- documentation.sections.messagesList.sync.syncButton.behavior1
- documentation.sections.messagesList.sync.syncButton.behavior2
- documentation.sections.messagesList.sync.syncButton.behavior3
- documentation.sections.messagesList.sync.syncButton.behavior4
documentation.sections.messagesList.sync.syncButton.whenToUse
- documentation.sections.messagesList.sync.syncButton.when1
- documentation.sections.messagesList.sync.syncButton.when2
- documentation.sections.messagesList.sync.syncButton.when3
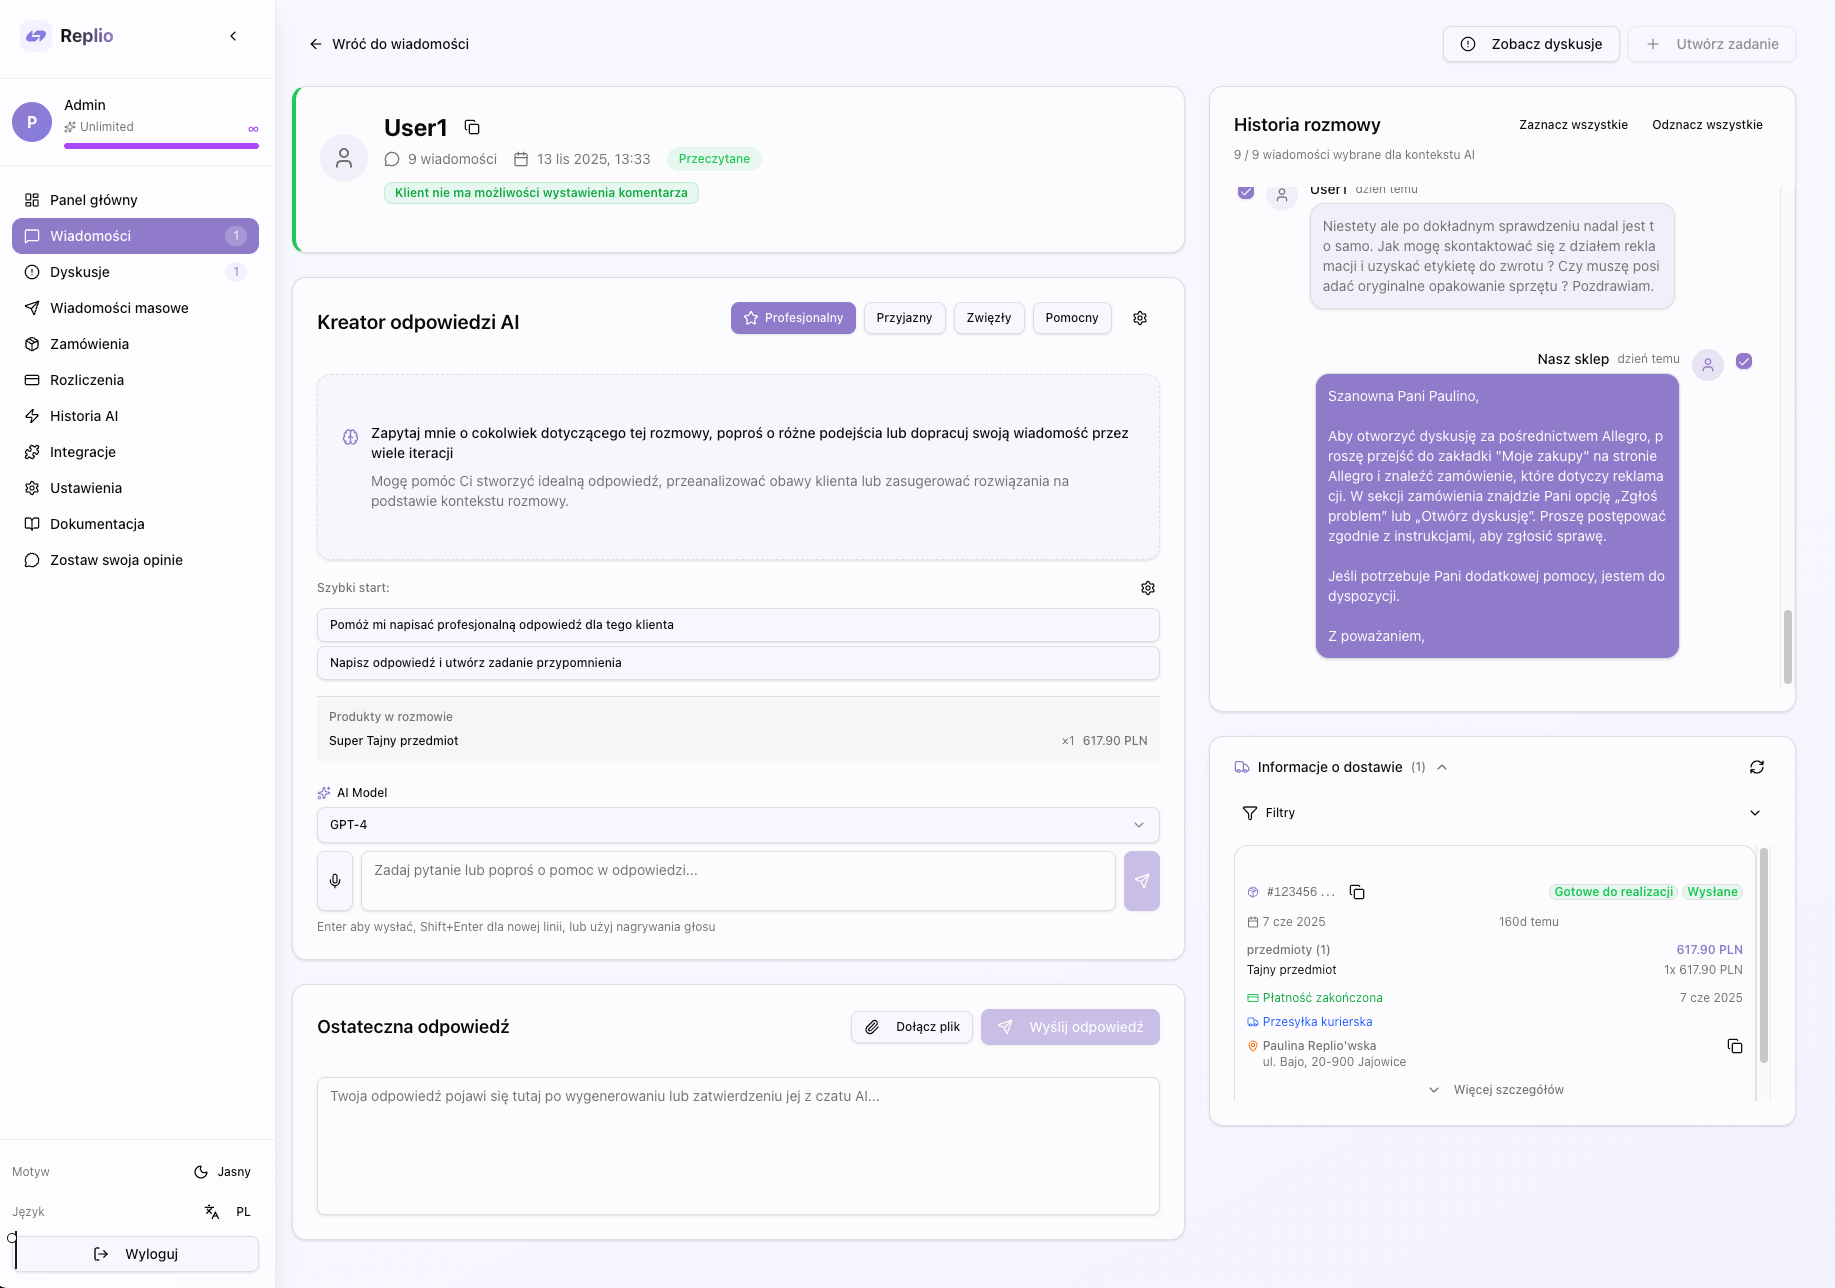
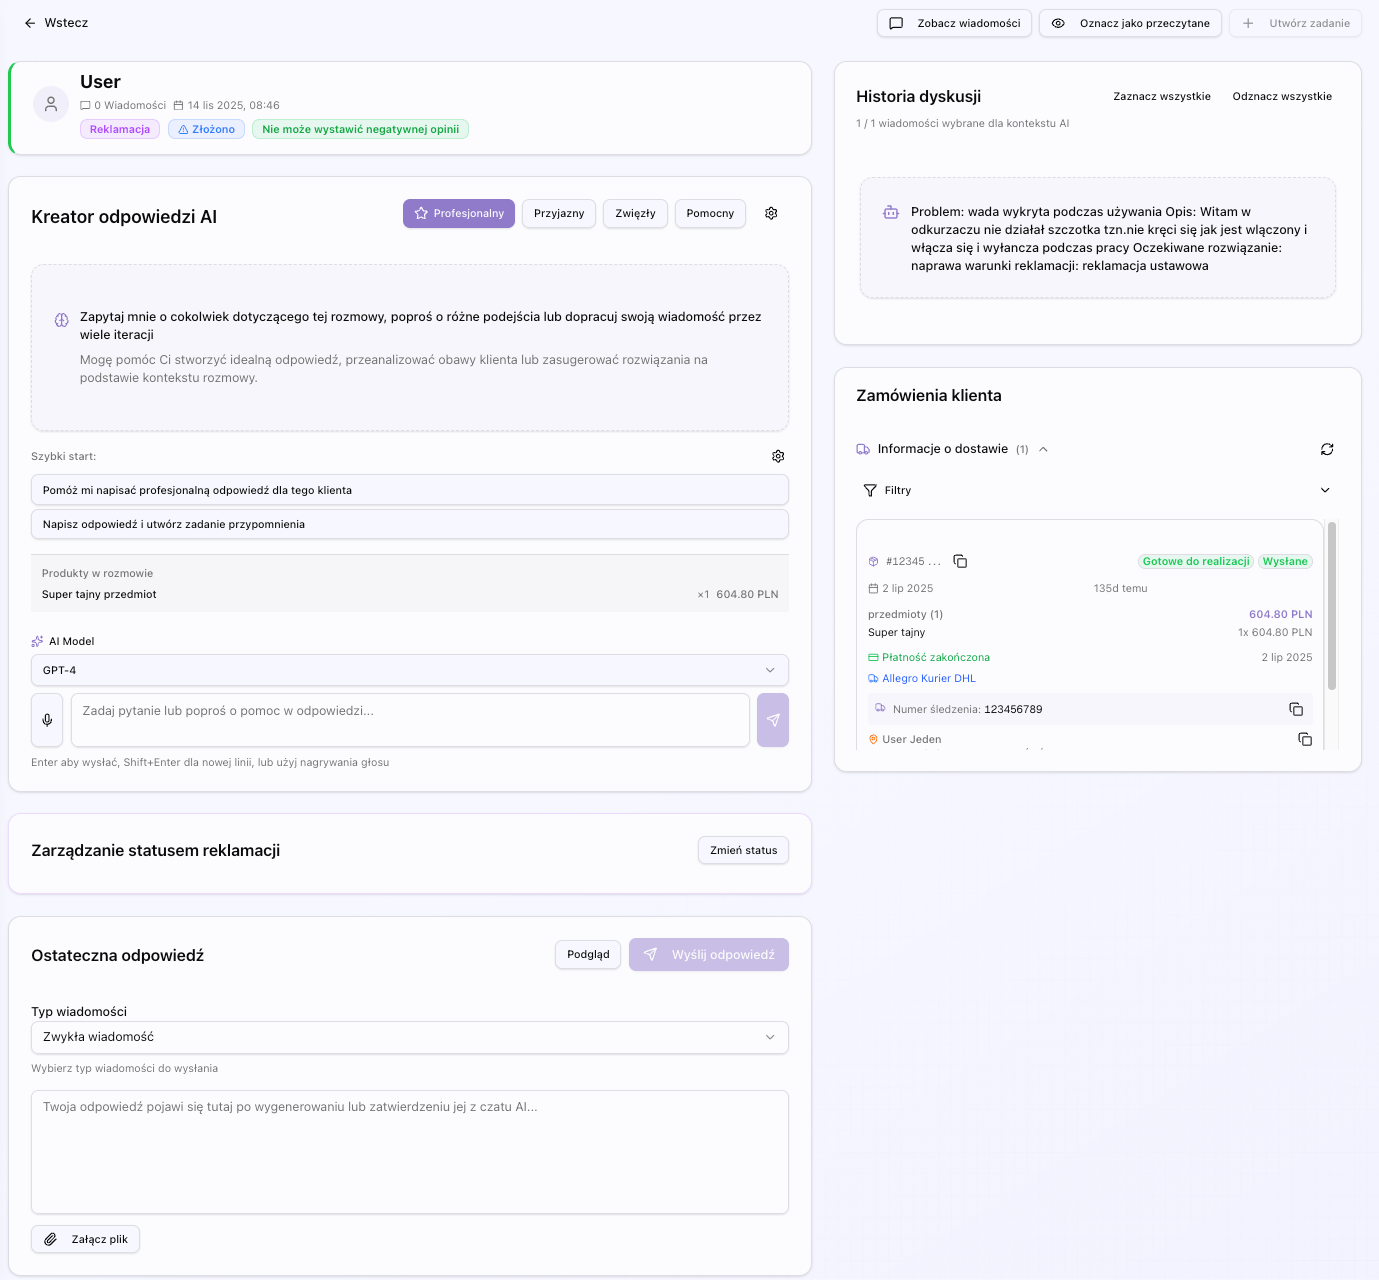
The message details page is an advanced communication center with customers. This is where you can read the entire conversation history, reply to messages, use the powerful AI assistant to create professional responses, manage attachments, and track related orders. The page is divided into several key sections: header with customer information, conversation panel, reply field, AI Chat panel, orders section, and action tools. Every interface element has been designed to maximize ease of communication with customers.
Ładowanie...
Page Layout
The message details page uses a two-column layout: the left column contains the header with customer information, conversation history and reply field, the right column contains the AI Chat panel. At the bottom of the page is a section with customer orders. The entire layout is responsive - on smaller screens, columns stack one below the other.
Ładowanie...
Conversation Panel
The main section of the page is the conversation panel, which displays the entire communication history with the customer in chronological order. The conversation panel is the heart of the message details page - here you see the entire communication history, you can select messages as context for AI, and here is the field for sending replies.
Ładowanie...
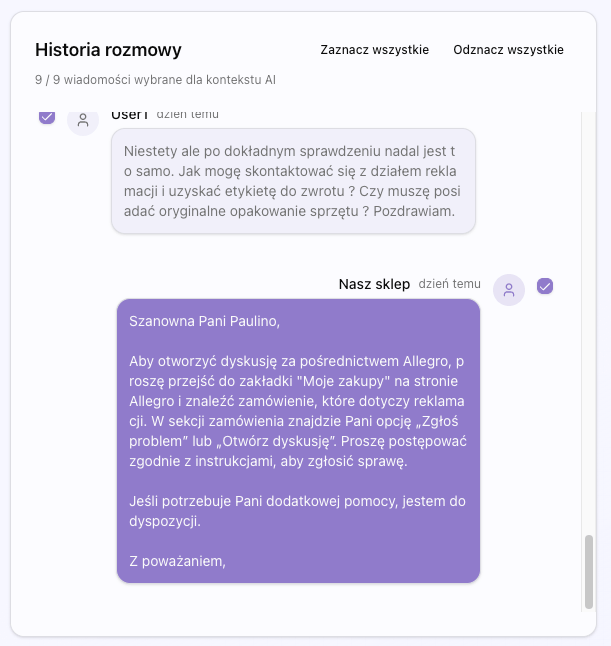
Message Display
Each message in the conversation is displayed as a card (bubble) with the following information. Messages are displayed in chronological order - oldest at the top, newest at the bottom.
- Avatar or initials of the sender (customer or you)
- Sender's username
- Message content with formatting (links, lists, bold)
- Message date and time
- Message status (read/unread)
- Attachments (if any) - images, documents, files
Automatic Scrolling
The conversation panel automatically scrolls to the latest message when new messages appear. This ensures you always see the latest part of the conversation.
Message Selection
You can select one or many messages from the conversation by clicking on them. Selected messages are highlighted and can be used as context for AI Chat. This allows AI to better understand the conversation context and create more accurate responses.
To select messages:
- Click on the message card to select it
- Click again to deselect
- Use the 'Select All' button to select all messages
- Use the 'Deselect All' button to deselect all messages
Reply Field
At the bottom of the conversation panel is the reply field, which allows you to create and send replies to the customer. This is the main tool for communicating with customers - here you type replies, add attachments, and send messages.
Ładowanie...
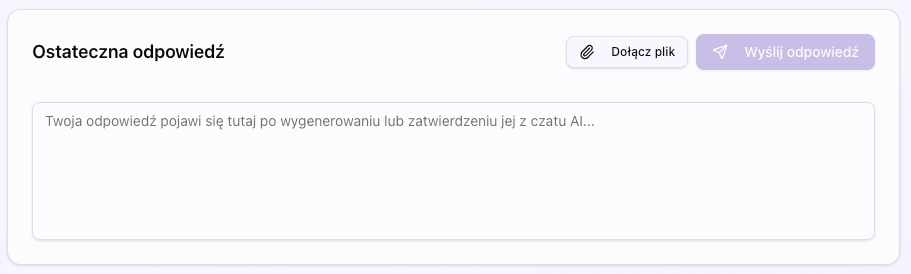
Reply Field Features
The reply field offers the following features:
- Editable text field with automatic expansion
- Text formatting support (bold, italic, lists)
- Button to add attachments
- 'Send' button to send the reply
- Character counter (optional)
- Reply preview before sending
AI Suggestions
When you use AI Chat to create replies, the generated reply automatically appears in the reply field:
AI Chat Panel
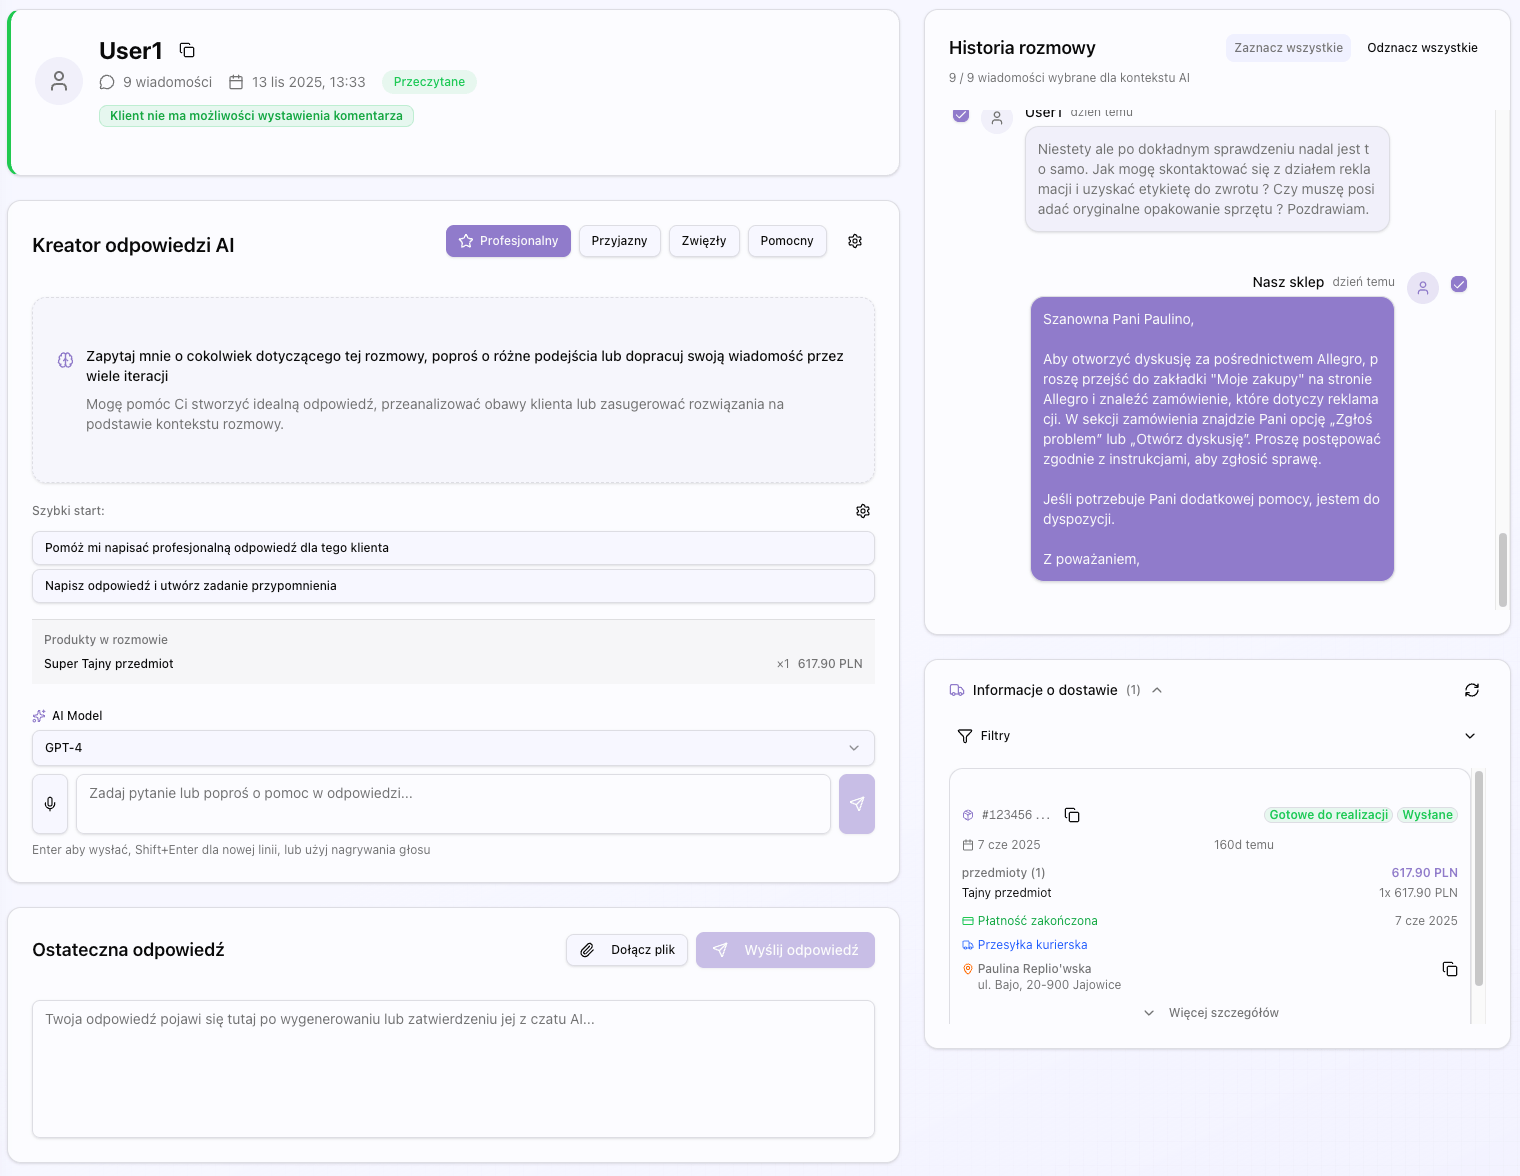
The AI Chat panel is an advanced tool for creating professional responses to customer messages. The panel is located on the right side of the page and offers full AI assistant functionality. This is the heart of Replio - here AI helps you create excellent replies that will satisfy customers and save your time.
Ładowanie...
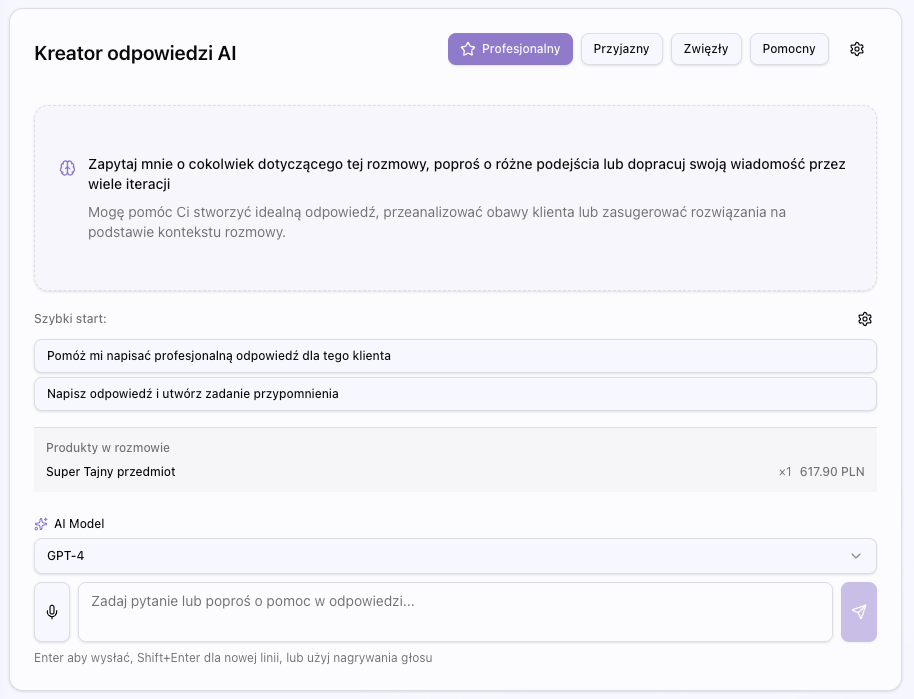
AI Chat Panel Features
The AI Chat panel offers the following advanced features:
✓ Conversational interface - you can ask questions and receive answers
✓ Response generation based on conversation context
✓ Multiple iterations - you can request corrections and refinement of responses
✓ Different response versions - you can request alternative versions
✓ Integration with orders - AI has access to customer order information
✓ Integration with Google Drive - you can search and attach files from Drive
✓ Integration with DHL - you can track shipments directly from the panel
✓ Attachment support - you can attach files to replies
AI Chat Workflow
Typical workflow with AI Chat panel:
- Read customer message in conversation panel
- Select messages to be used as context (optional)
- Open AI Chat panel and select communication persona
- Ask a question or request a reply (e.g., 'Create a professional reply to this message')
- AI generates reply based on conversation context and orders
- Review the generated reply
- If you need changes, request corrections (e.g., 'Make the reply more friendly')
- When satisfied, accept the reply - it will automatically appear in the reply field
- Edit the reply if needed and send
AI Models
You can choose AI model to use:
- GPT-4o - Most advanced model, best response quality, higher cost
- GPT-4o Mini - Faster and cheaper model, still very good quality
- GPT-4 Turbo - Balanced model between quality and cost
Context for AI
AI Chat automatically has access to the following information:
- Entire conversation history with customer
- All customer orders
- Shipment statuses (if you have DHL integration)
- Knowledge base information (if configured)
- Selected messages (if you selected specific messages)
Voice Input
You can input questions to AI by voice using the microphone button. System automatically transcribes your speech using OpenAI Whisper.
How it works:
- Click microphone button in AI Chat input field
- Allow microphone access (if first time)
- Speak your question - recording starts automatically
- Click again to stop recording
- Audio is sent to OpenAI Whisper for transcription
- Transcription appears automatically in input field
- You can edit transcription before sending
Features:
- Real-time recording indicator
- Recording duration display
- Automatic transcription with high accuracy
- Polish language support
Quick Start Templates
AI Chat panel has quick start templates available - ready-made questions you can click to quickly start conversation with AI.
How to use:
- Click one of templates displayed above input field
- Template automatically fills input field
- You can edit text before sending
- Send message as usual
You can create and manage templates in Settings → Quick Start section.
Persona Selection
Personas are predefined communication styles that determine the tone and style of AI responses. You can choose a persona from the list of available personas or create your own in the Settings section.
Available Personas
Replio offers several predefined personas:
How to Select Persona
To select a persona:
- Click on the 'Persona' dropdown in AI Chat panel
- Select persona from the list
- Persona is automatically applied to all subsequent AI responses
- You can change persona at any time
Action Buttons
The message details page offers several action buttons that allow you to manage the conversation and perform various operations.
Mark as Read
The 'Mark as Read' button allows you to mark the entire conversation as read. This removes the conversation from the unread messages list.
Use this button when:
- You've read all messages in the conversation
- You no longer need to track this conversation as unread
- You want to organize the unread messages list
Create Todoist Task
The 'Create Todoist Task' button allows you to create a task in Todoist based on selected messages. This is useful when you want to track customer service tasks.
Requirements:
- You must have Todoist connection in the Integrations section
- You must select at least one message from the conversation
How it works:
- Select messages that will be the basis of the task
- Click the 'Create Todoist Task' button
- AI automatically generates task title and description based on selected messages
- You can edit title and description before creating the task
- Task is created in your Todoist project
Customer Orders
At the bottom of the message details page, all orders from that customer are displayed. This allows quick access to conversation context and better understanding of the customer's situation.
Ładowanie...
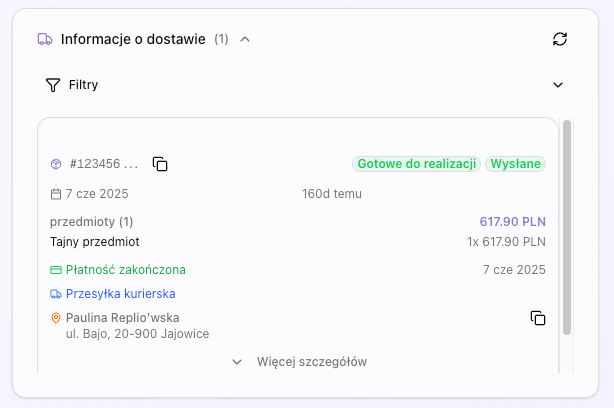
Order Display
Each order is displayed as a card with the following information:
- Order number
- Order date
- List of products in the order
- Payment status
- Fulfillment status
- Delivery address
- Shipment tracking information (if available)
Order Interaction
You can click on an order to see more details. This opens a modal or takes you to the order details page.
Context for AI
Order information is automatically available for AI Chat, allowing AI to create more accurate responses that take into account the context of customer orders.
Attachments
You can add attachments to replies, which is useful when you want to send documents, images, or other files to the customer.
Ładowanie...
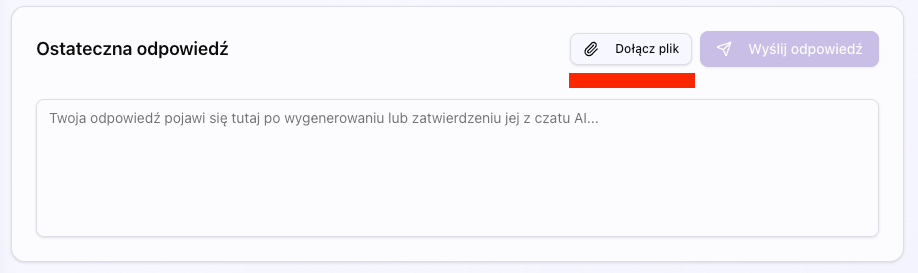
How to Add Attachment
To add an attachment to a reply:
- Click the paperclip icon in the reply field
- Select file from disk or drag and drop file
- File is automatically uploaded and attached to reply
- You can add multiple attachments to one reply
Supported File Types
Replio supports the following file types:
- Images - JPG, PNG, GIF, WebP
- Documents - PDF, DOC, DOCX, TXT
- Spreadsheets - XLS, XLSX, CSV
- Other - ZIP, RAR (with size limitations)
Size Limits
There are file size limits:
- Maximum size of single file: 10 MB
- Maximum number of attachments per reply: 5
- Maximum total size of all attachments: 25 MB
Attachments from AI
AI Chat can also suggest attachments for replies. For example, if AI detects that the reply should contain instructions, it may suggest attaching a PDF file with instructions.
The disputes list page shows all claims and disputes with customers. You can filter by type, status, and other criteria.
Ładowanie...
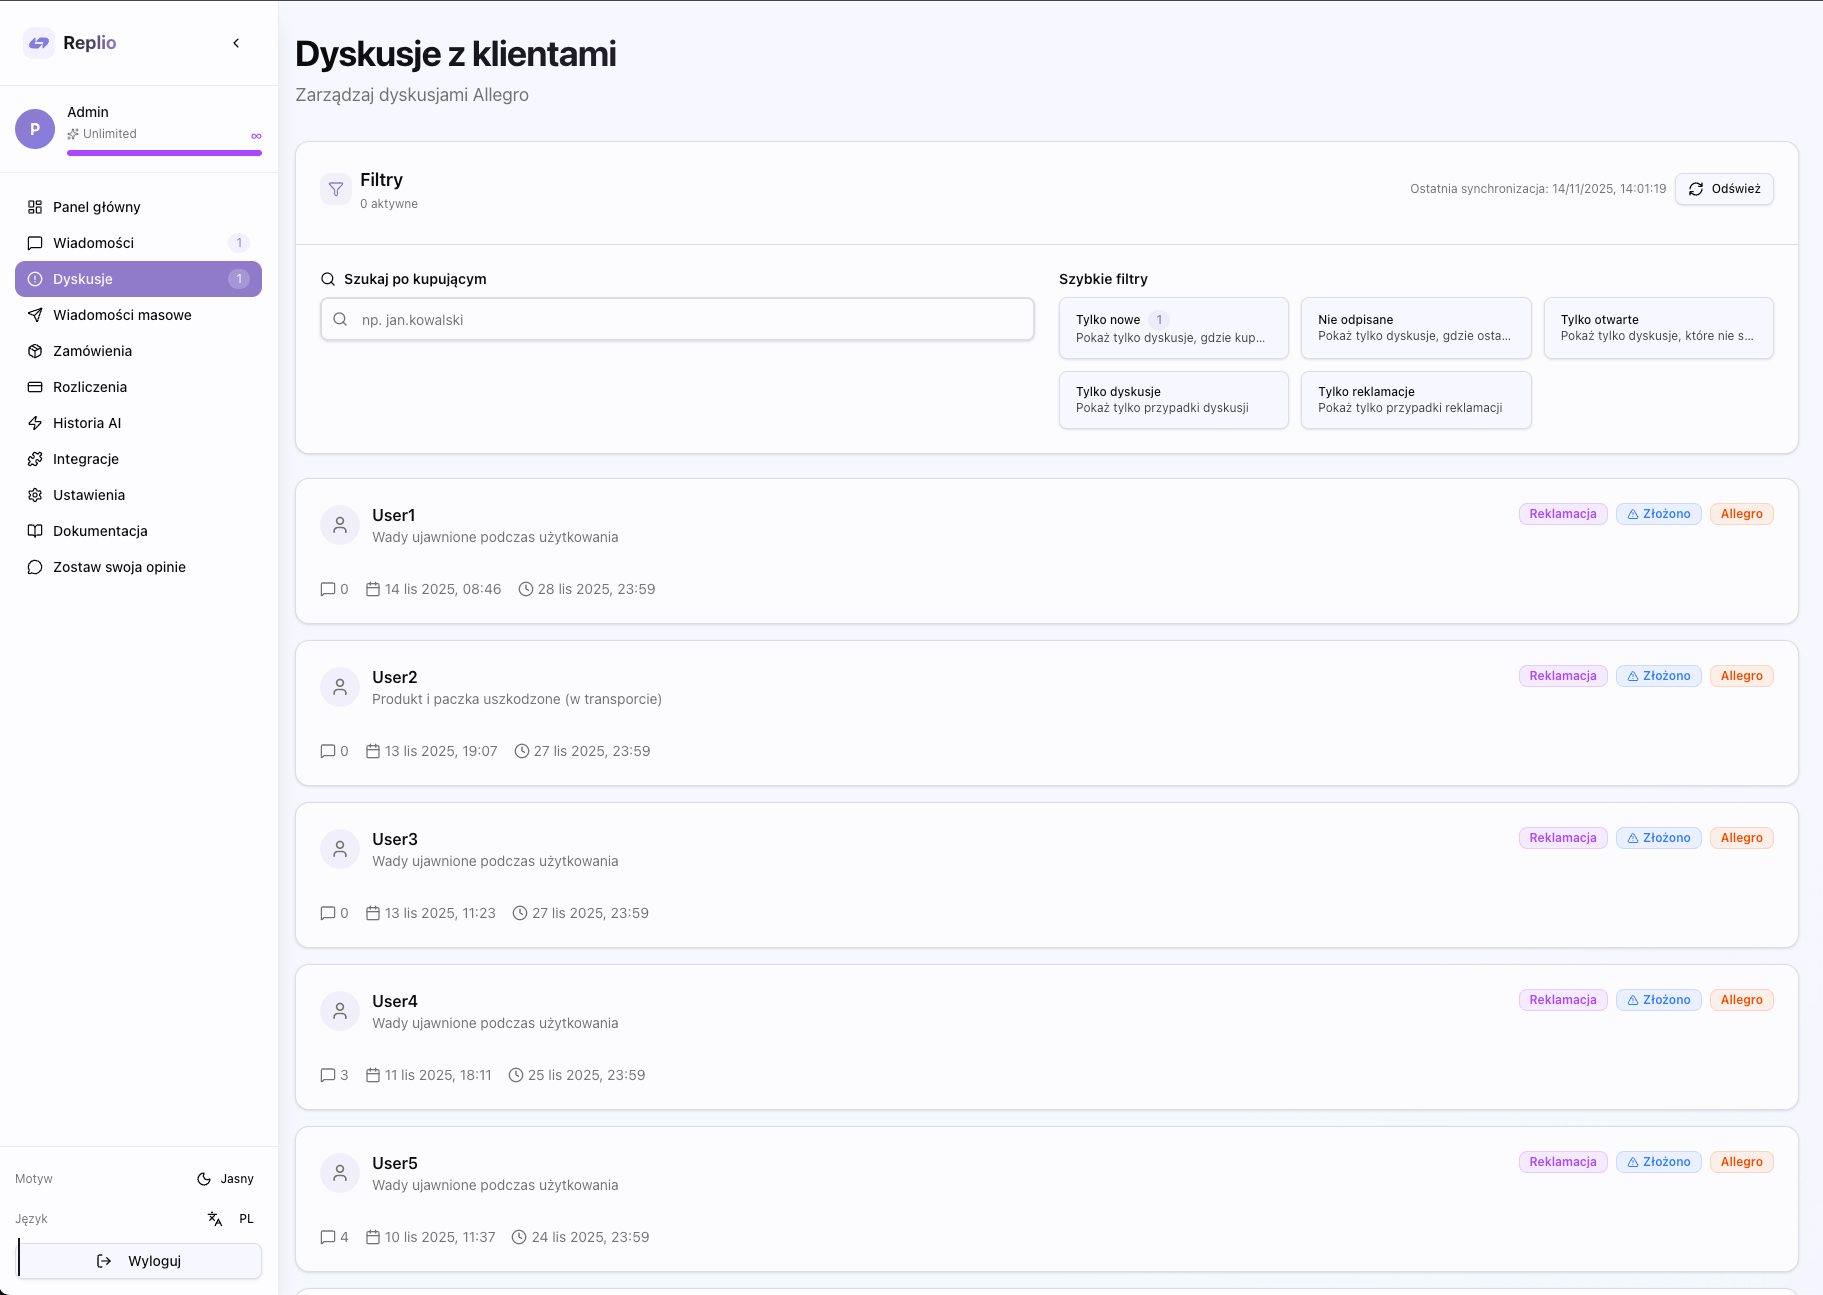
Dispute Filters
Filter by type: Disputes (disputes) or Claims.
Filter by status: Ongoing, Closed, Unresolved, Submitted, Accepted, Rejected.
Show only new disputes that haven't been marked as viewed yet.
Dispute Cards
Each dispute is displayed as a card with basic information: type, status, buyer, opening date, and last message.
The dispute details page allows you to manage a claim or dispute, reply to messages, and change the case status.
Ładowanie...
Chat Panel
Similar to messages, you can browse the entire communication history and use AI Chat to create responses.
Chat panel works similarly to messages section - you can browse communication history, select messages as context and use AI Chat to create responses.
Risk Assessment
Replio offers risk assessment feature that analyzes conversation with customer and assesses risk level and customer sentiment.
Risk Assessment Features
Risk assessment analyzes the following aspects of conversation:
- Risk level - low, medium, high, critical
- Customer sentiment - positive, neutral, frustrated, angry, hostile
- Communication tone - polite, neutral, demanding, aggressive, threatening
- Urgency - low, medium, high
- Red flags - list of potential problems
- Positive signals - list of positive indicators
- Key issues - main problems reported by customer
- Recommended action - suggested action
How to use:
- Open dispute details page
- Click 'Assess Risk' button or find risk assessment card
- AI analyzes conversation and displays detailed assessment
- Use information to take appropriate actions
Risk Levels
- Niski: Polite, reasonable customer with no concerning behavior
- Średni: Frustrated customer but reasonable, or minor red flags present
- Wysoki: Aggressive tone, threats, or multiple red flags
- Krytyczny: Serious threats, legal action mentioned, or extreme abusive behavior
Claim Status Change
For claims, you can change the status (Accepted/Rejected) directly from the details page.
For claims you can change status directly from details page. Available statuses: Accepted and Rejected.
Mark as Viewed
The 'Mark as Viewed' button allows you to mark a dispute as viewed, which removes it from the new disputes list.
'Mark as Viewed' button removes dispute from new disputes list and helps manage cases.
Link to Messages
If there's a related conversation with the customer, you can navigate to it directly from the dispute page.
If there's a related conversation with customer, you can navigate to it directly from dispute page.
The mass messages feature allows you to send the same message to multiple customers at once. Perfect for notifications, order cancellations, and other mass communications.
Ładowanie...
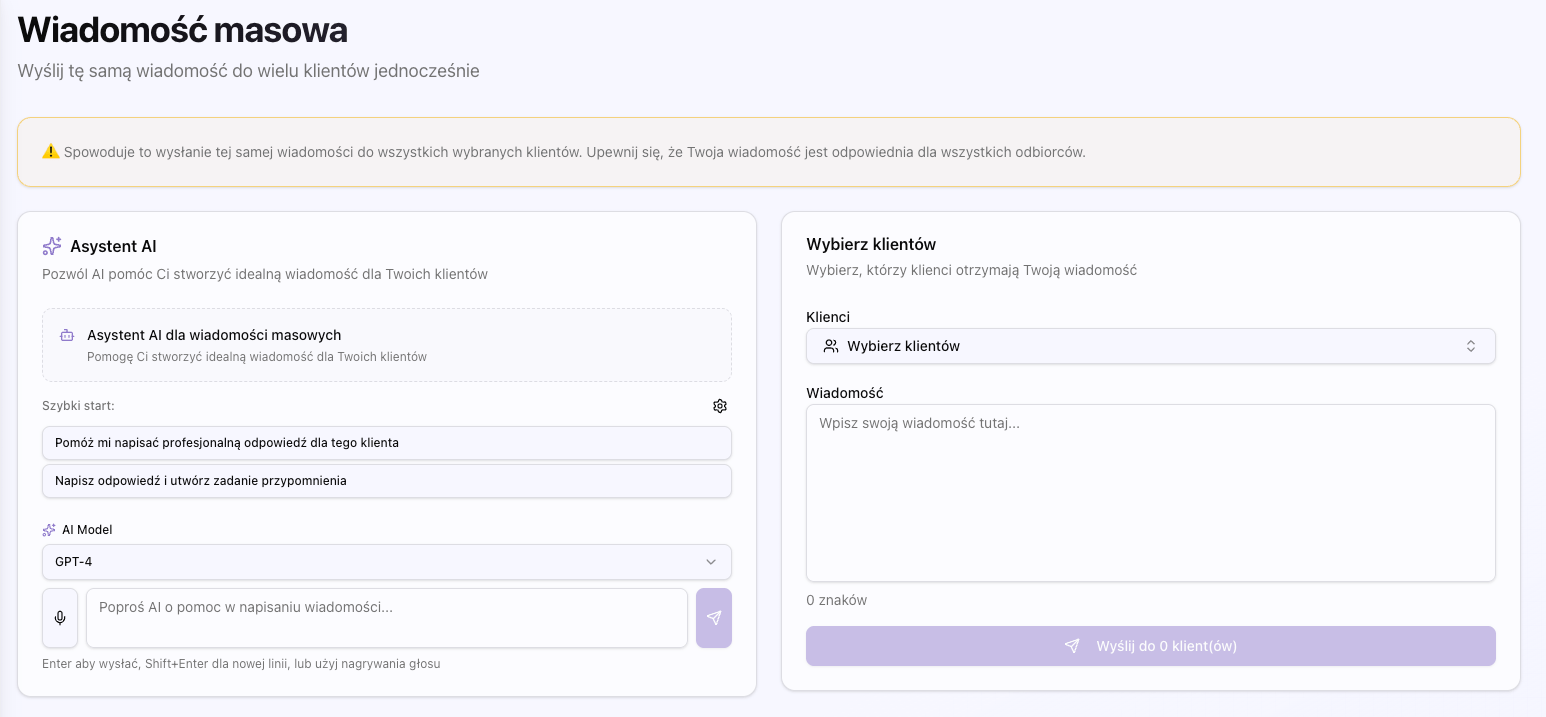
Feature Purpose
Mass messages are particularly useful in the following situations:
- Order cancellations - notifying multiple customers about their order cancellations
- Delay notifications - informing customers about delays in order fulfillment
- Promotions and updates - sending mass notifications about promotions or updates
Client Selection
You can select clients from the list or use the search to find specific recipients. You can select multiple clients at once.
AI Chat for Message Creation
The AI Chat panel helps create an appropriate mass message, taking into account context and communication purpose.
Tier Limits
The number of clients you can send a mass message to depends on your subscription plan. The Premium plan offers higher limits than the free plan.
The orders page allows you to browse and manage all orders from Allegro. You can filter, search, and track the status of each order.
Ładowanie...
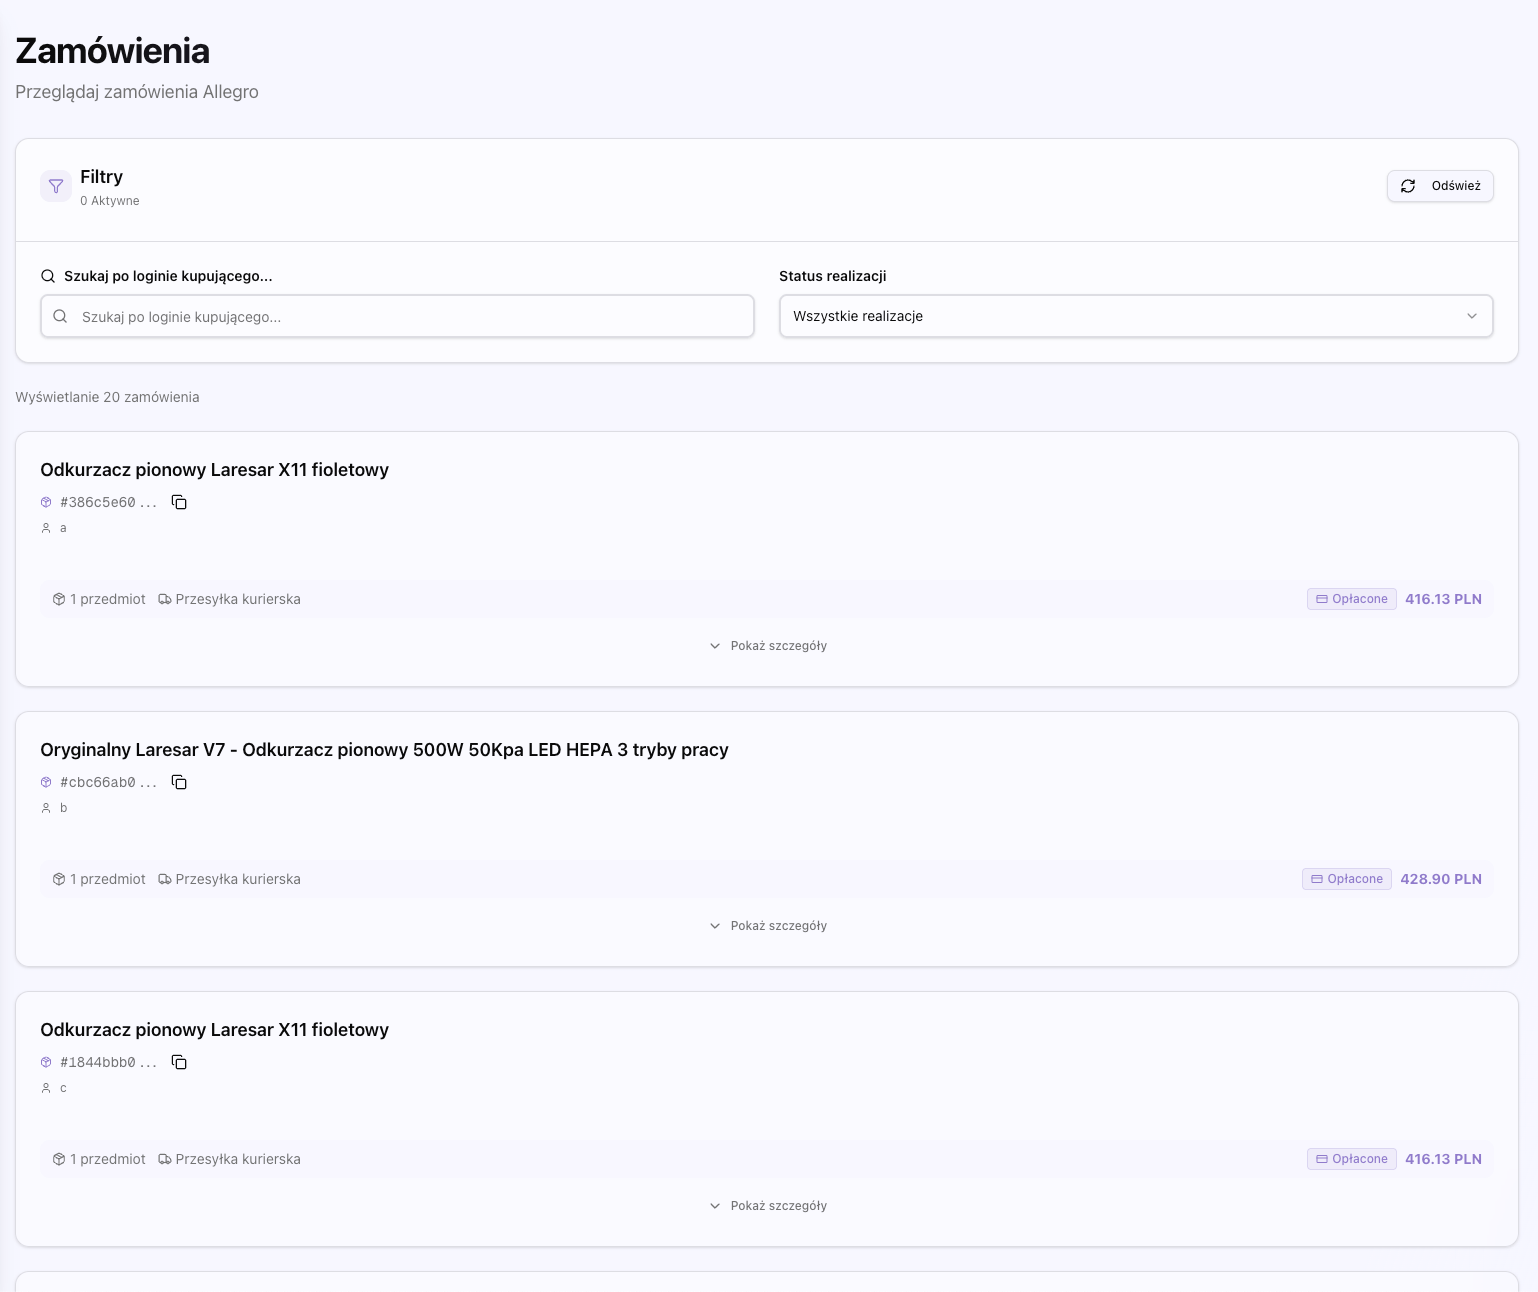
Order Filters
Filter by payment status: New, Processing, Sent, Cancelled.
Filter by fulfillment status: Ready for Processing, In Preparation, Sent, Delivered.
Search orders by buyer username.
Order Details
By clicking on an order, you can see details: products, delivery address, payment and fulfillment status, and shipment tracking information.
DHL Integration
If you have a DHL connection, you can track shipment status directly from the orders page.
The billing page allows you to manage your subscription, view payment history, and configure invoice data.
Ładowanie...
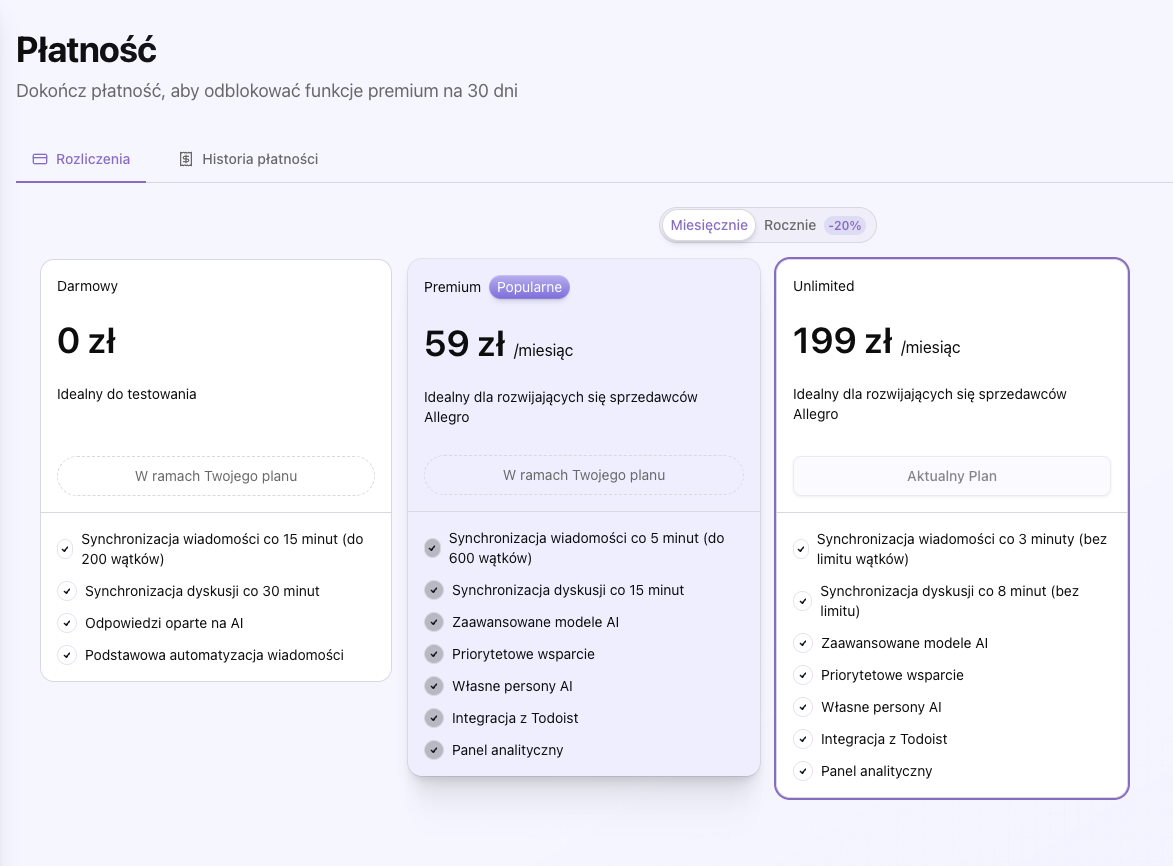
Subscription Plans
You can choose from three plans:
Free plan with 50 AI requests monthly - perfect for testing.
- 50 AI requests per month
- Access to basic features
- Limited mass messages
Premium plan for 59 PLN/month with 2000 AI requests - for growing sellers.
- 2000 AI requests per month
- All free plan features
- Higher mass message limits
- Priority support
59 zł/miesiąc
Unlimited plan with unlimited AI requests - for large operations.
- Unlimited AI requests
- All Premium plan features
- Unlimited mass messages
- Dedicated support
199 zł/miesiąc
Payments
Payments are processed through Stripe - secure payment system. We support monthly and yearly payments.
- Credit/debit cards (Visa, Mastercard, American Express)
- Online payments through Stripe
- Automatic subscription renewal
Payment History
Browse all your payments, subscription statuses, and expiration dates in one place.
Payment history displays all your transactions, including date, amount, subscription plan, payment status and invoice download links.
- Filter by time period
- Download PDF invoices
- Status of each payment
Invoice Data
Configure company data for invoicing: name, tax ID, registration number, address. This data will be used when generating invoices.
Automatic Invoice Generation
After configuring invoice data in Settings section, invoices are automatically generated with each payment through Stripe.
Invoices contain:
- Company data from Settings section
- Payment and plan details
- Invoice number and dates
- PDF download capability
The AI history page shows all uses of AI features in Replio, along with costs and details of each use.
Ładowanie...
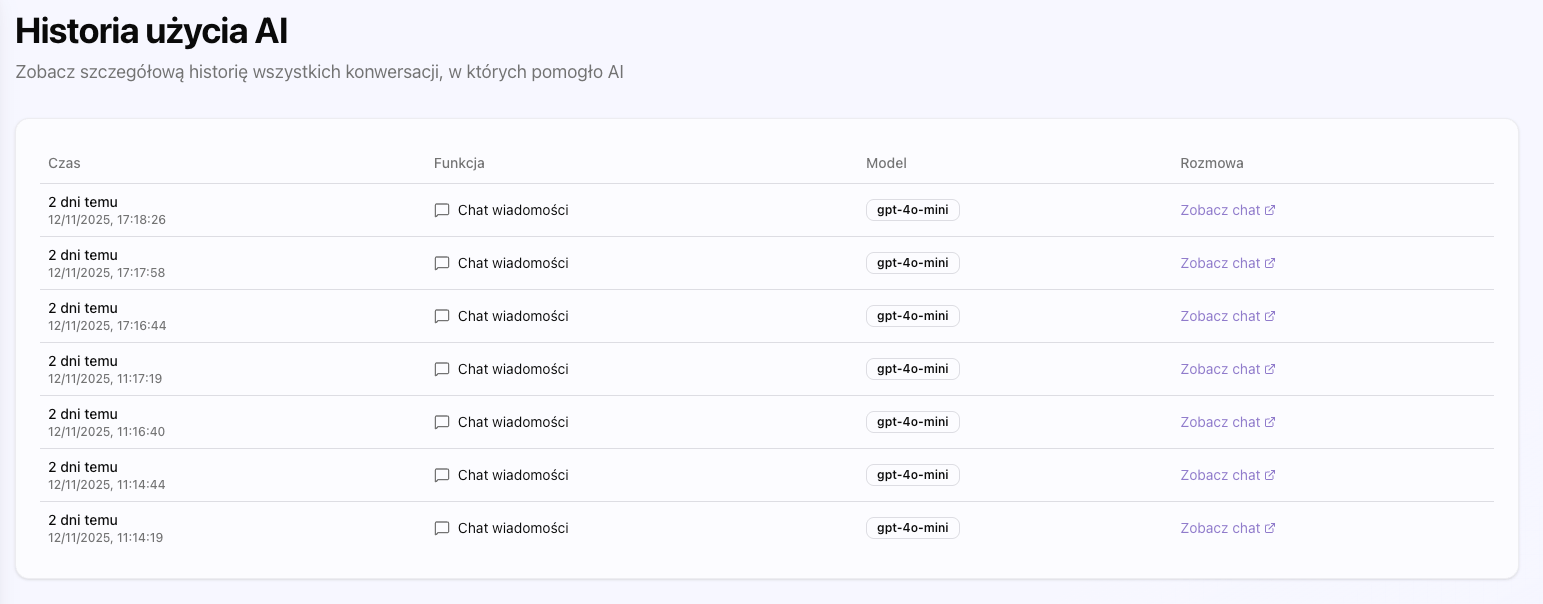
AI Usage List
See all AI queries, including: usage type (message, dispute, mass message), AI model used, cost, and usage time.
Costs
Each AI use shows the cost in USD and total cost for the selected period. You can track your AI expenses.
Time Filters
Filter AI usage by date: today, yesterday, last week, last month, or select your own date range.
Replio offers integrations with many external services that extend the platform's functionality.
Ładowanie...
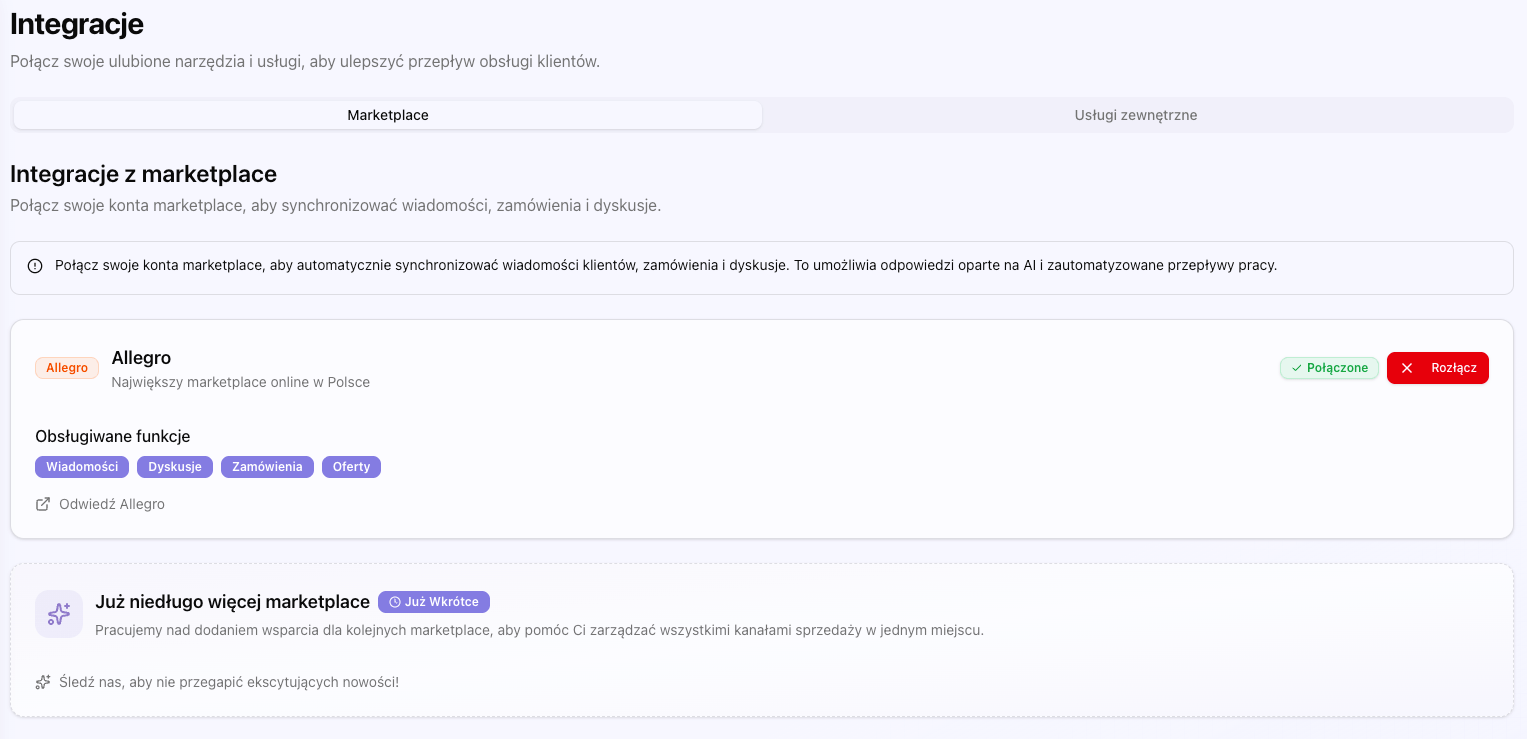
Allegro OAuth
The main Allegro integration allows synchronization of messages, orders, and disputes. The connection is secure and encrypted.
Todoist
Connect with Todoist to automatically create tasks from messages and disputes. Perfect for customer service task management.
DHL
DHL integration allows you to track shipments and automatically update order statuses in Replio.
Google Drive
Connect with Google Drive to access documents when creating responses. You can search and attach files from Drive.
Integration Features
- File search in Google Drive directly from AI Chat
- Automatic file attachment to replies
- AI has access to file content from Drive
- You can ask AI to find specific file (e.g. 'find instruction manual')
Setup
To use Google Drive integration:
- Go to Integrations section
- Click 'Connect' next to Google Drive
- Log in to Google account and authorize access
- Integration is ready to use
Empik
Replio also supports integration with Empik - Polish marketplace for books, music and multimedia.
Empik Integration Features
- Message synchronization from Empik
- Order management from Empik
- Dispute and claim handling
- Same interface and AI features as for Allegro
The settings page allows you to configure all aspects of Replio, from AI personas to account data.
Ładowanie...
Personas
Manage AI communication styles. You can edit existing personas or create new ones tailored to your communication style.
Default Personas
Replio offers four predefined communication personas that you can use right away.
- Professional - formal, business tone
- Friendly - warm, personal style
- Concise - short, concrete responses
- Formal - very official tone
Custom Personas
You can create your own personas tailored to your communication style.
- Click 'Add Persona'
- Enter name and description of communication style
- Save persona
- Persona will be available in AI Chat
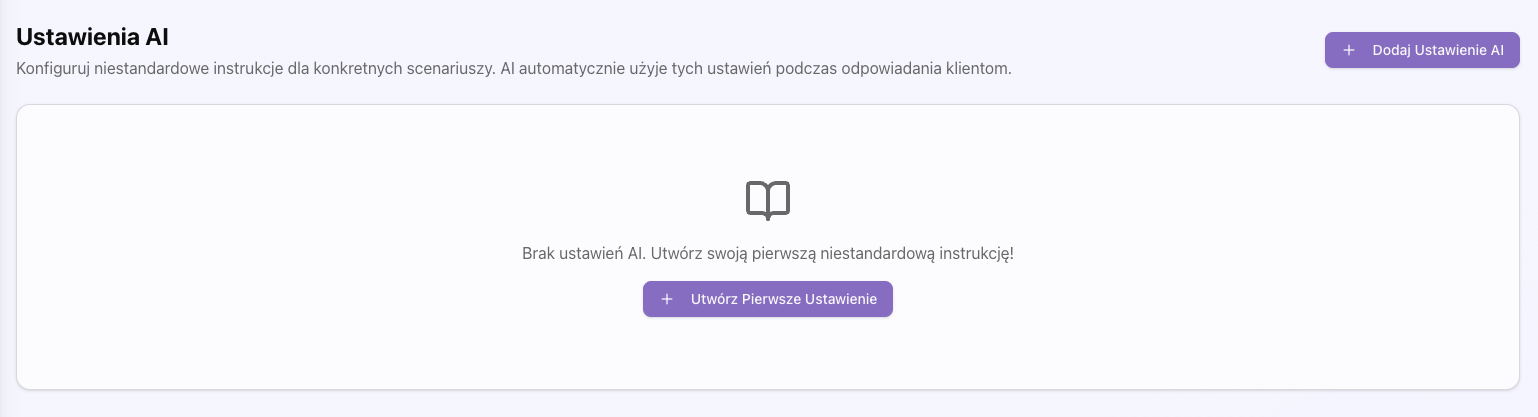
Knowledge Base
Add information about your company, products, and policies that AI will use when creating responses. This helps AI better understand the context of your business.
Purpose of Knowledge Base
Knowledge base allows AI to better understand your company context and create more accurate responses.
You can add information about:
- Return and complaint policies
- Delivery times and shipping costs
- Warranty and sales conditions
- Special instructions for customers
Entry Management
You can create, edit and delete knowledge base entries. Each entry has a title, instruction and optional category.
- Prioritization - you can set entry priorities
- Categories - organize entries into categories
- Activation/deactivation - you can temporarily disable entries
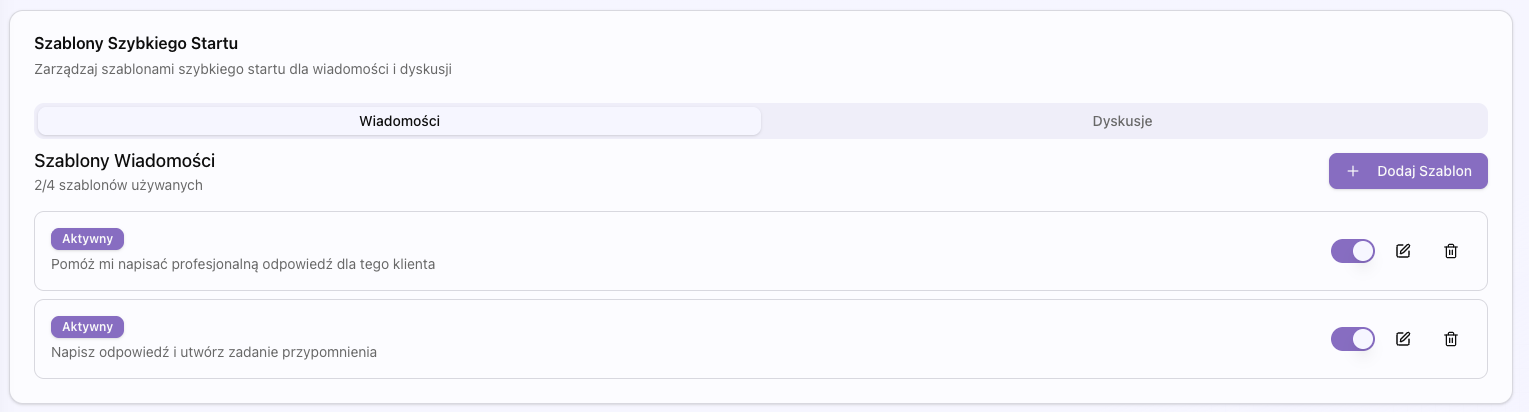
Quick Start Templates
Create quick start templates for frequently used responses. These templates can be used as a starting point for AI responses.
Quick Start Templates
Quick start templates are ready-made questions you can use in AI Chat to quickly start a conversation with AI.
How it works:
- Create template in Settings section
- Template appears as a button in AI Chat
- Click template to automatically fill input field
- You can edit text before sending
You can create templates for:
- Messages - templates for use in conversations
- Disputes - templates for use in disputes and claims
Limits
You can create maximum 4 templates per type (messages and disputes). Templates can have maximum 155 characters.
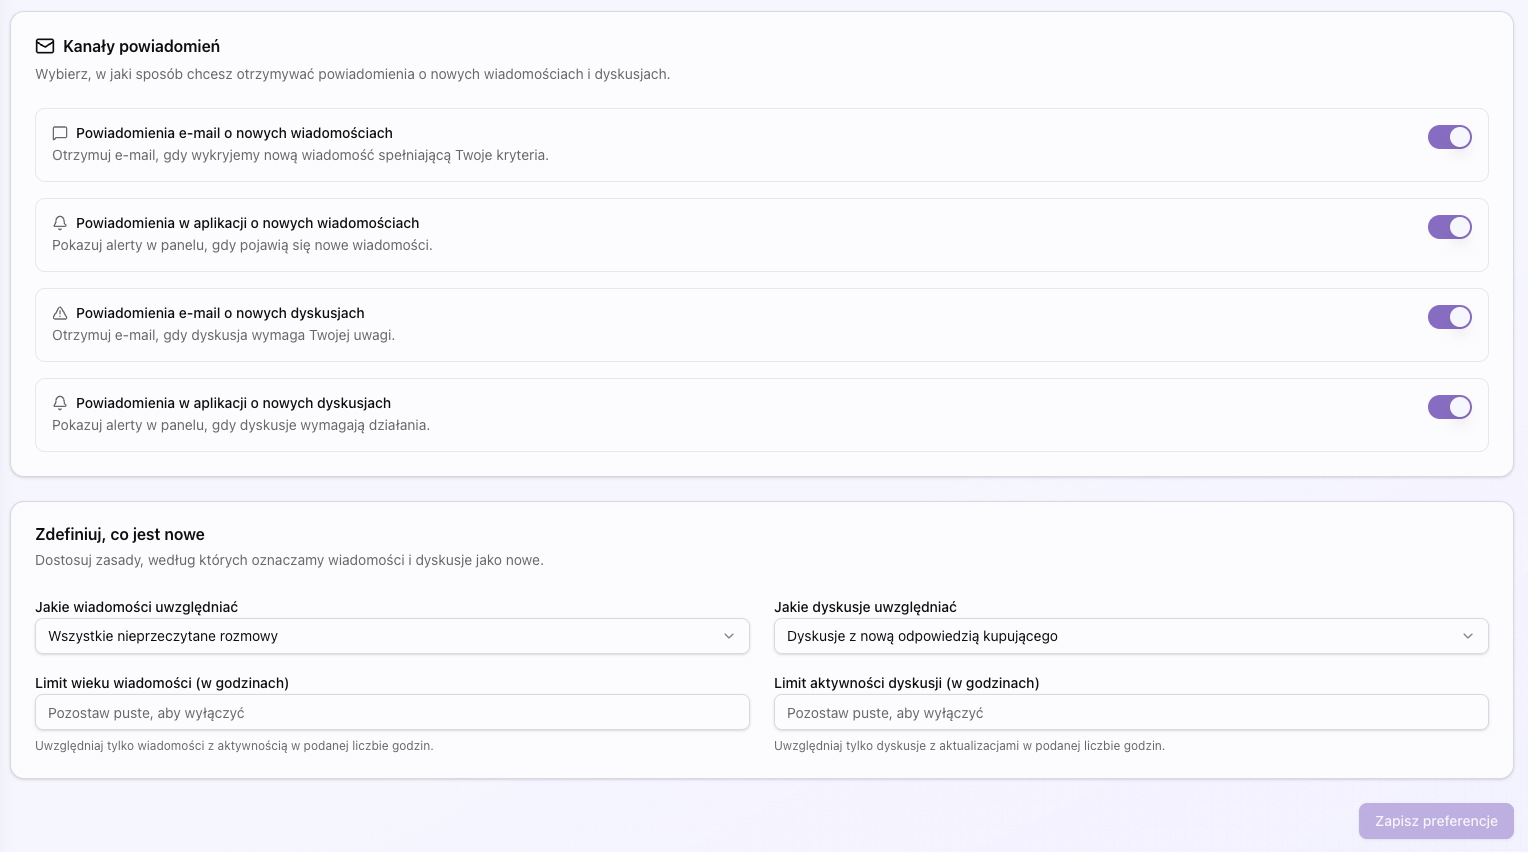
Notifications
Configure how and when you want to receive notifications about new messages and disputes.
Message Notifications
Control notifications about new messages from customers.
- Email - receive email notifications
- In-app - notifications in interface
- Status - choose when to receive notifications (unread, from buyer, etc.)
- Time window - set how old messages should be considered
Dispute Notifications
Control notifications about new disputes and claims.
- Email - receive email notifications
- In-app - notifications in interface
- Status - choose when to receive notifications (buyer reply, open, etc.)
- Time window - set how old disputes should be considered
Invoice Data
Configure company data that will be used when generating invoices for subscription.
Required Fields
- Company name - full name of your company
- NIP - tax identification number
- Address - full company address
- City
- Postal code
Automatic Invoice Generation
After configuring invoice data, invoices will be automatically generated with each payment. You can download them from Billing section.
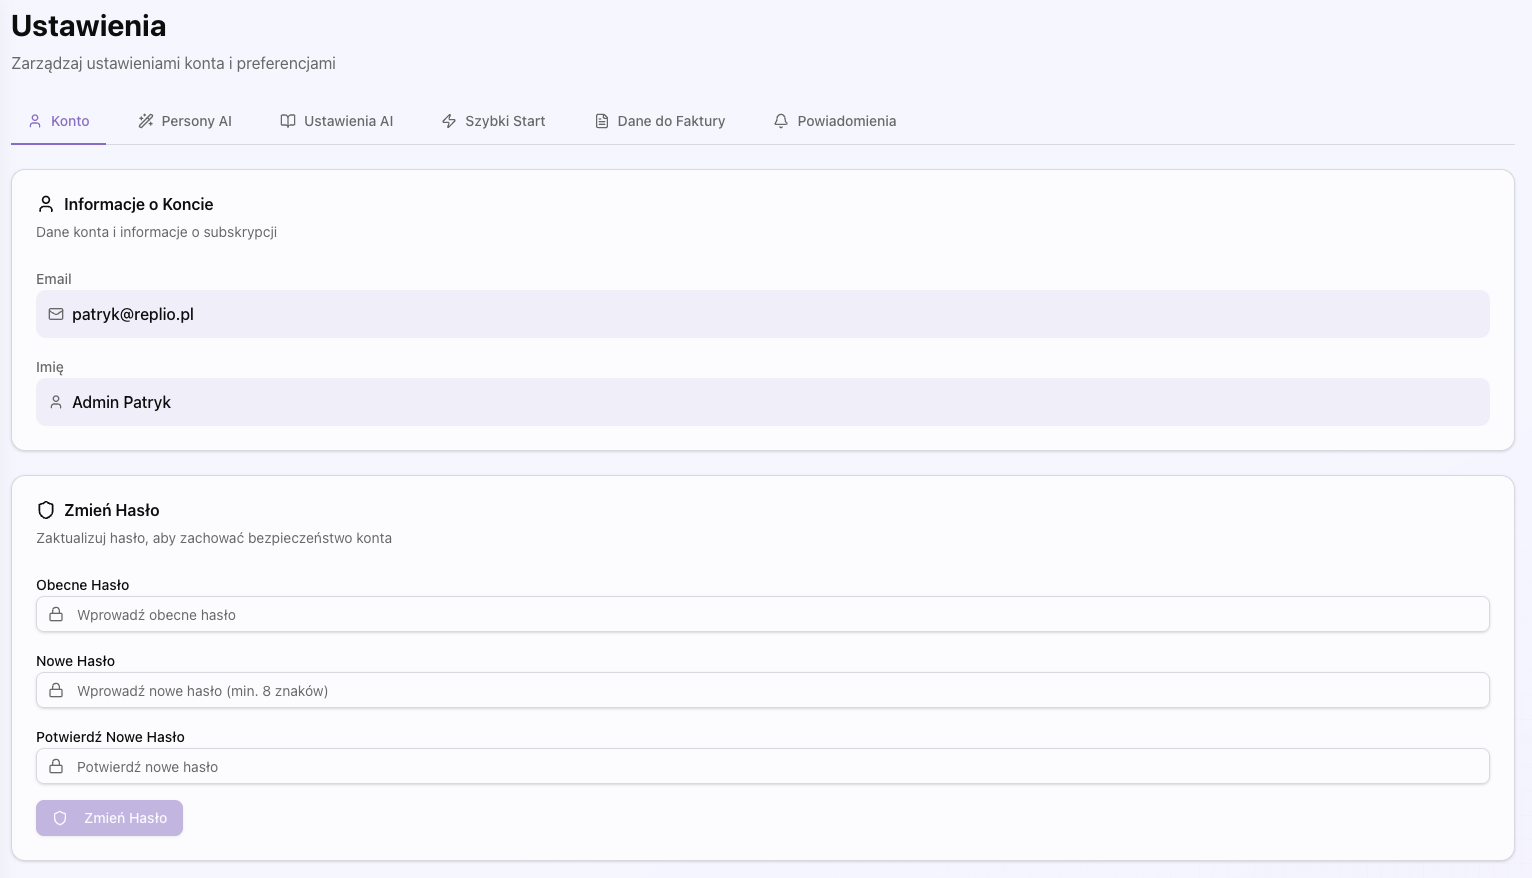
User Account
Manage account data: email, username, password. You can also change your password in this section.
Account Information
View and edit basic account information:
- Email - account email address
- Name - your name (optional)
Change Password
Change account password to maintain security.
Password must be at least 8 characters long.
Learn how to get the most out of Replio with these helpful tips and best practices.
Quick Response Tips
Tips for responding quickly and effectively to customer messages.
Ładowanie...
✓ Use quick start templates for common questions
✓ Review AI suggestions before sending
✓ Customize responses to match your brand voice
✓ Use voice input for faster message creation
AI Optimization
Get better AI responses by following these guidelines.
Ładowanie...
1. Keep knowledge base entries up to date
2. Use specific personas for different situations
3. Provide context by selecting relevant messages
4. Review and refine AI responses before sending
Workflow Optimization
Streamline your customer service workflow.
Ładowanie...
→ Set up notifications for urgent messages
→ Use filters to prioritize important conversations
→ Mark messages as viewed to track progress
→ Use mass messages for announcements
Real-world examples of how to use Replio effectively.
Handling a Return Request
Step-by-step guide for handling customer return requests.
Customer sends return request message
AI analyzes request and order details
AI generates response with return policy
Review and customize response
Send response to customer
Resolving a Dispute
How to effectively resolve customer disputes using Replio.
Review dispute details and risk assessment
Use AI Chat to draft response
Consider customer sentiment and urgency
Send professional, empathetic response
Track dispute status and follow up
Mass Communication
Best practices for sending mass messages to customers.
Select target audience using filters
Use AI to draft message
Review and personalize if needed
Send to multiple customers at once
Track delivery and responses